Integrating ixBrowser with Bright Data Proxies: A Step-by-Step Guide
Discover how to seamlessly set up and integrate ixBrowser with Bright Data's powerful proxies. ixBrowser stands as a dependable, permanent, and free anti-detect browser, designed to empower users with the ability to craft numerous distinct fingerprint profiles and even collaborate with team members. With its exceptional fingerprint technology, ixBrowser boasts an impressive success rate on third-party fingerprint detection platforms, effectively alleviating users' worries about potential account associations.
Setting Up Bright Data Proxies with ixBrowser: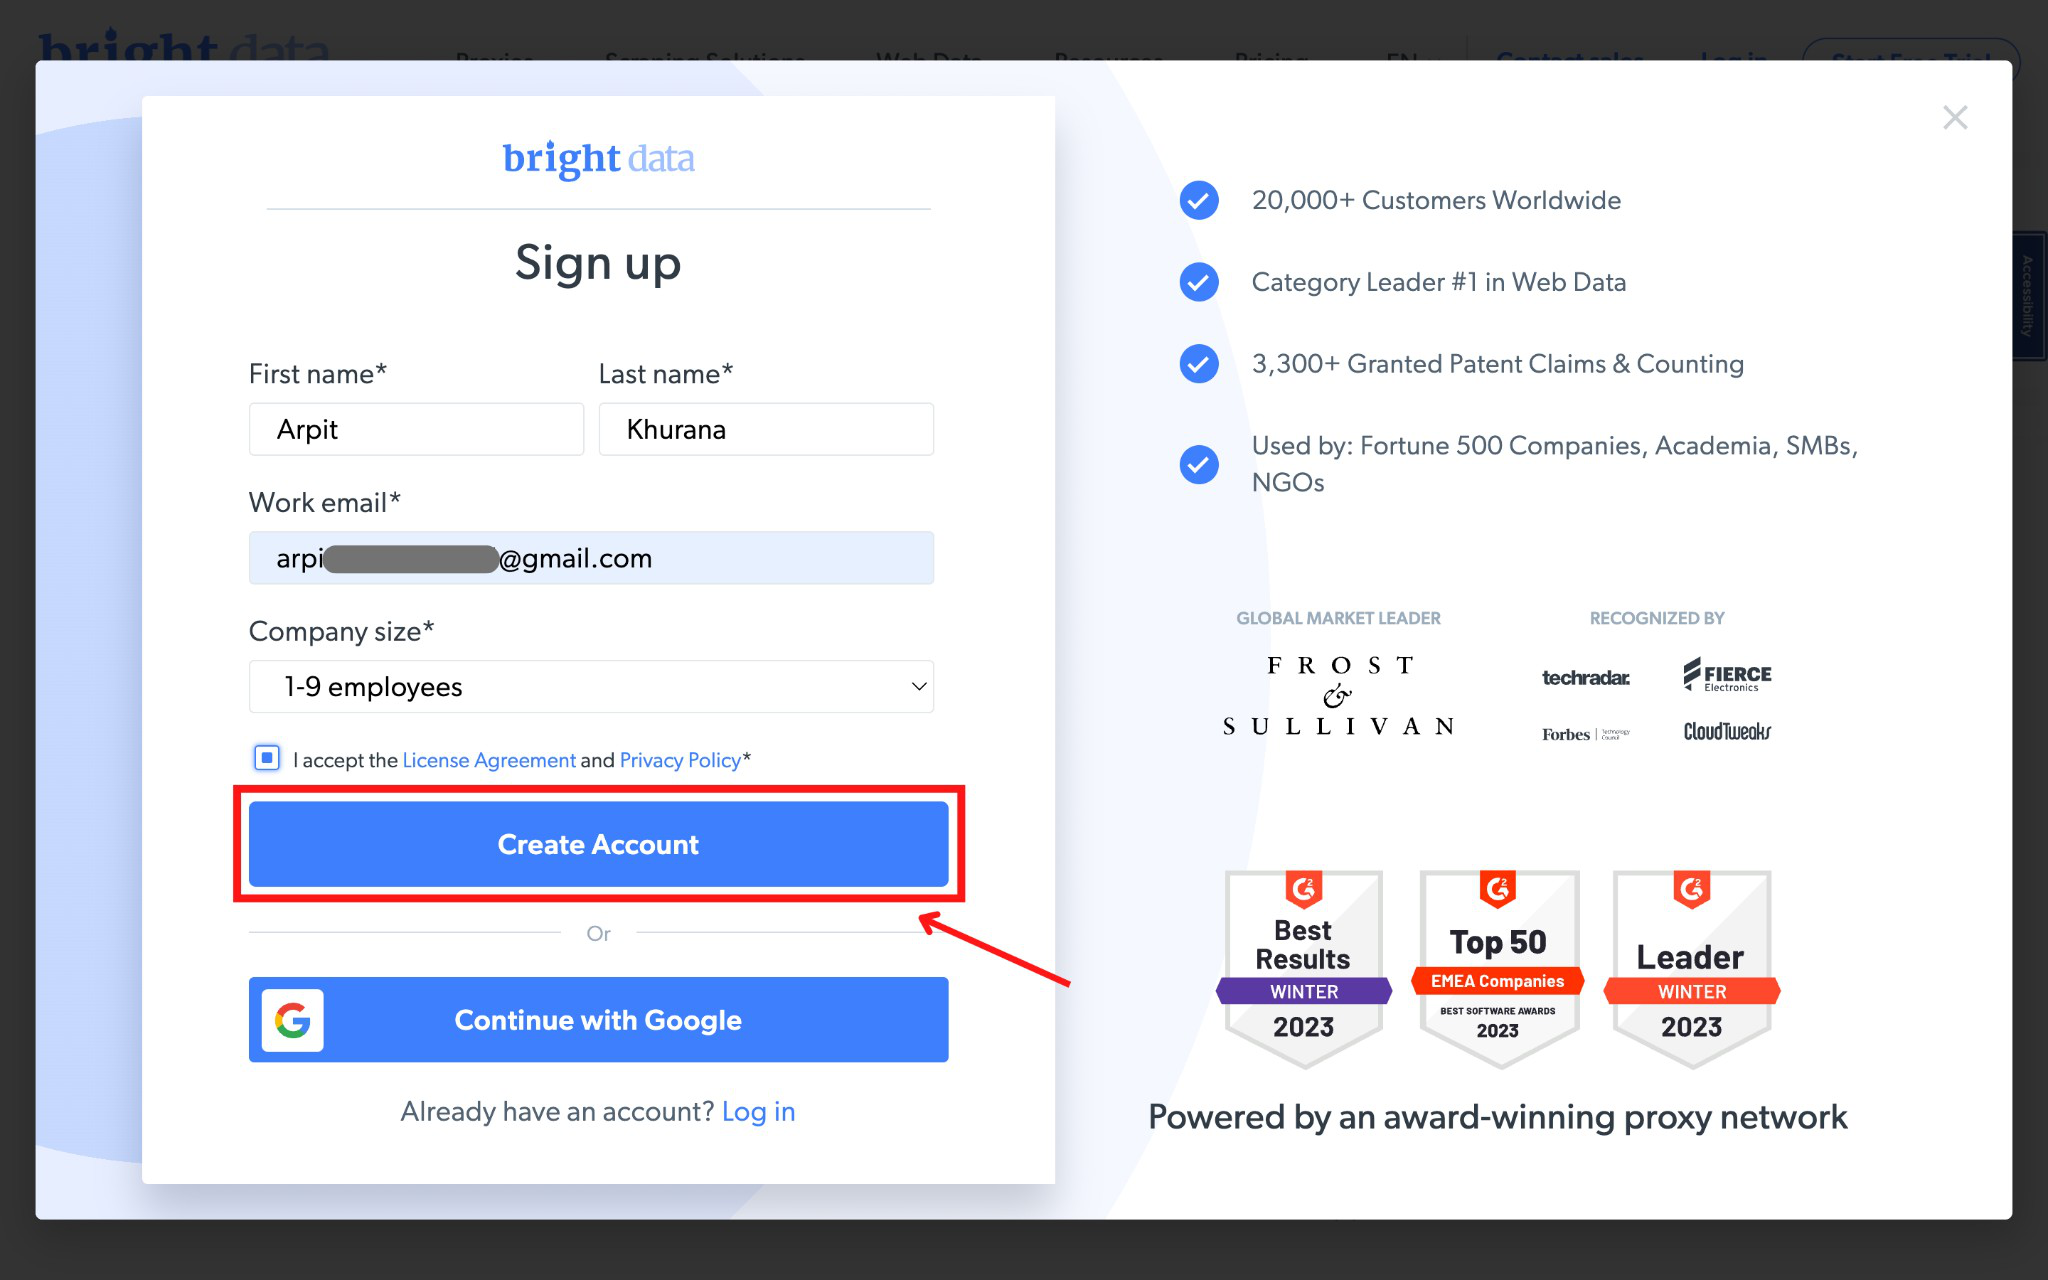


section in your Proxies & Scraping Infrastructure dashboard.
In Conclusion: By following these numbered sub-steps, you can seamlessly integrate ixBrowser with Bright Data's robust proxy system. This integration equips you with advanced fingerprint technology and reliable proxies, enabling secure online activities and data scraping.
Setting Up Bright Data Proxies with ixBrowser:
Step 1: Registration with Bright Data
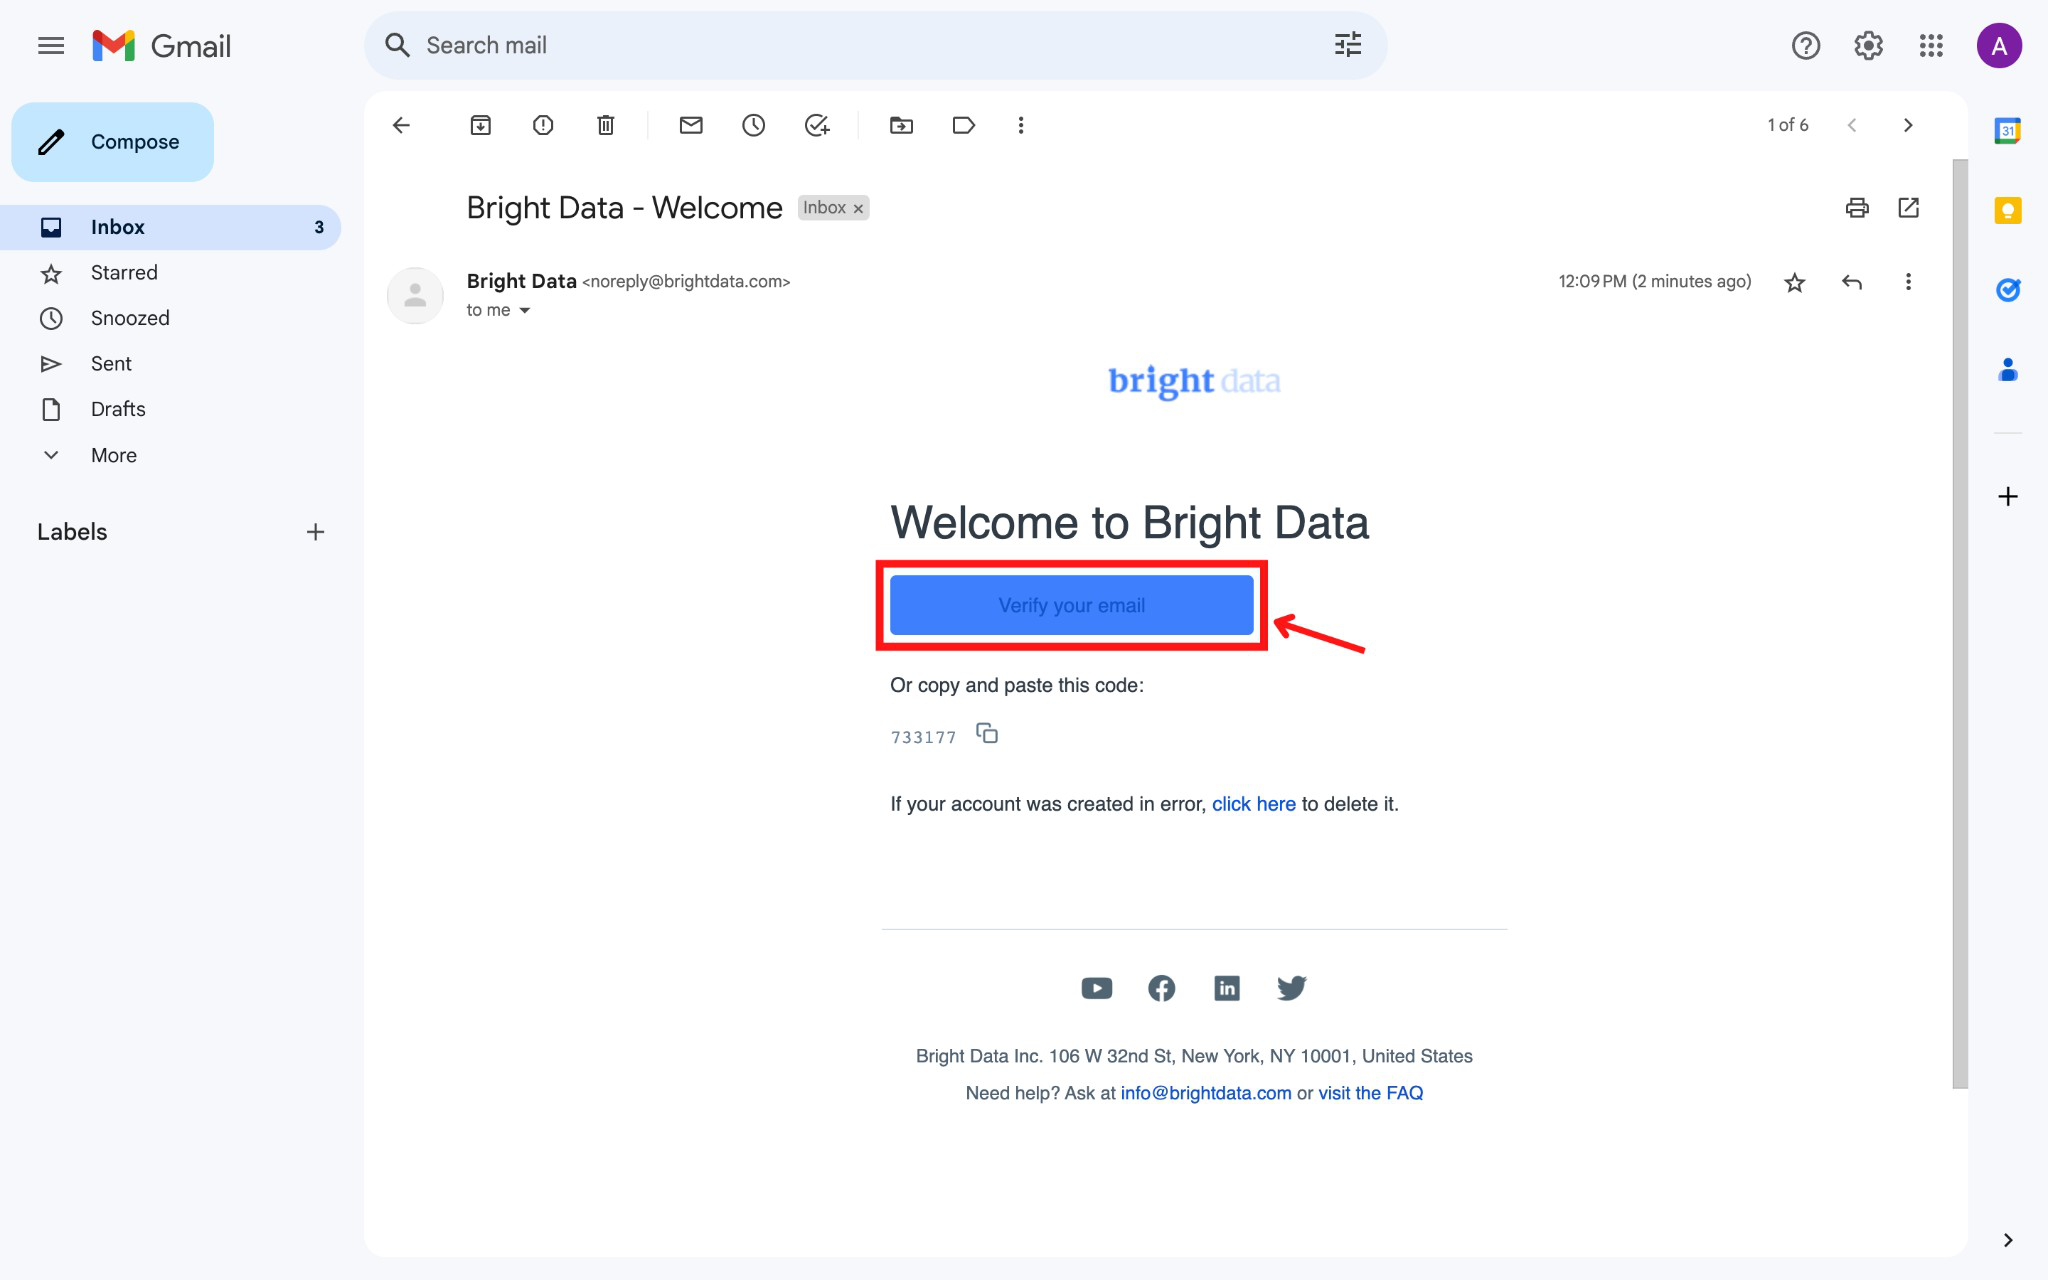
- Sign up on the Bright Data platform and verify your email address.
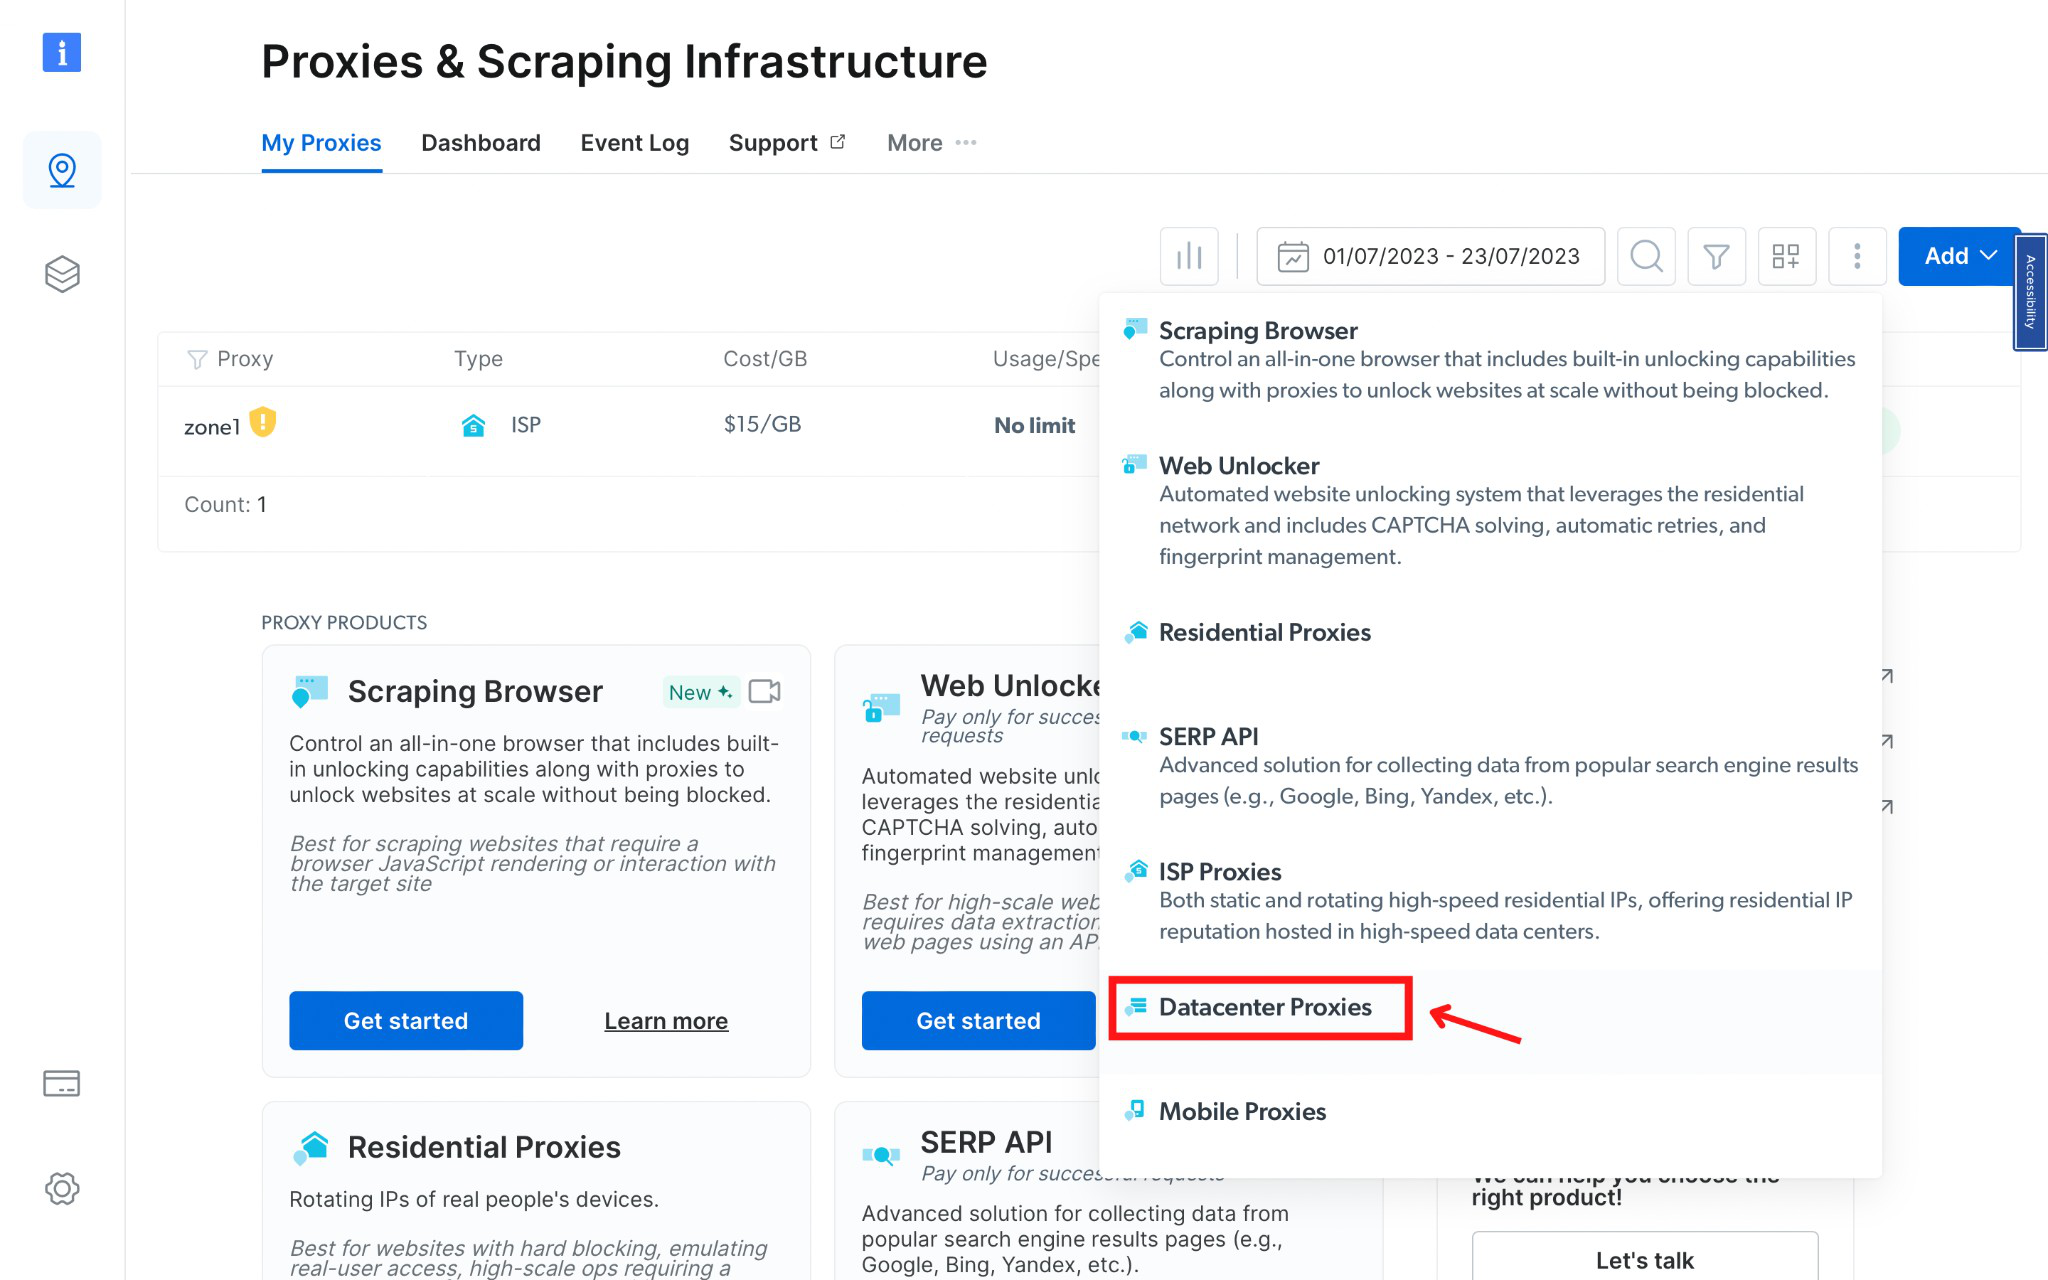
- Create a designated Zone for your proxy usage.
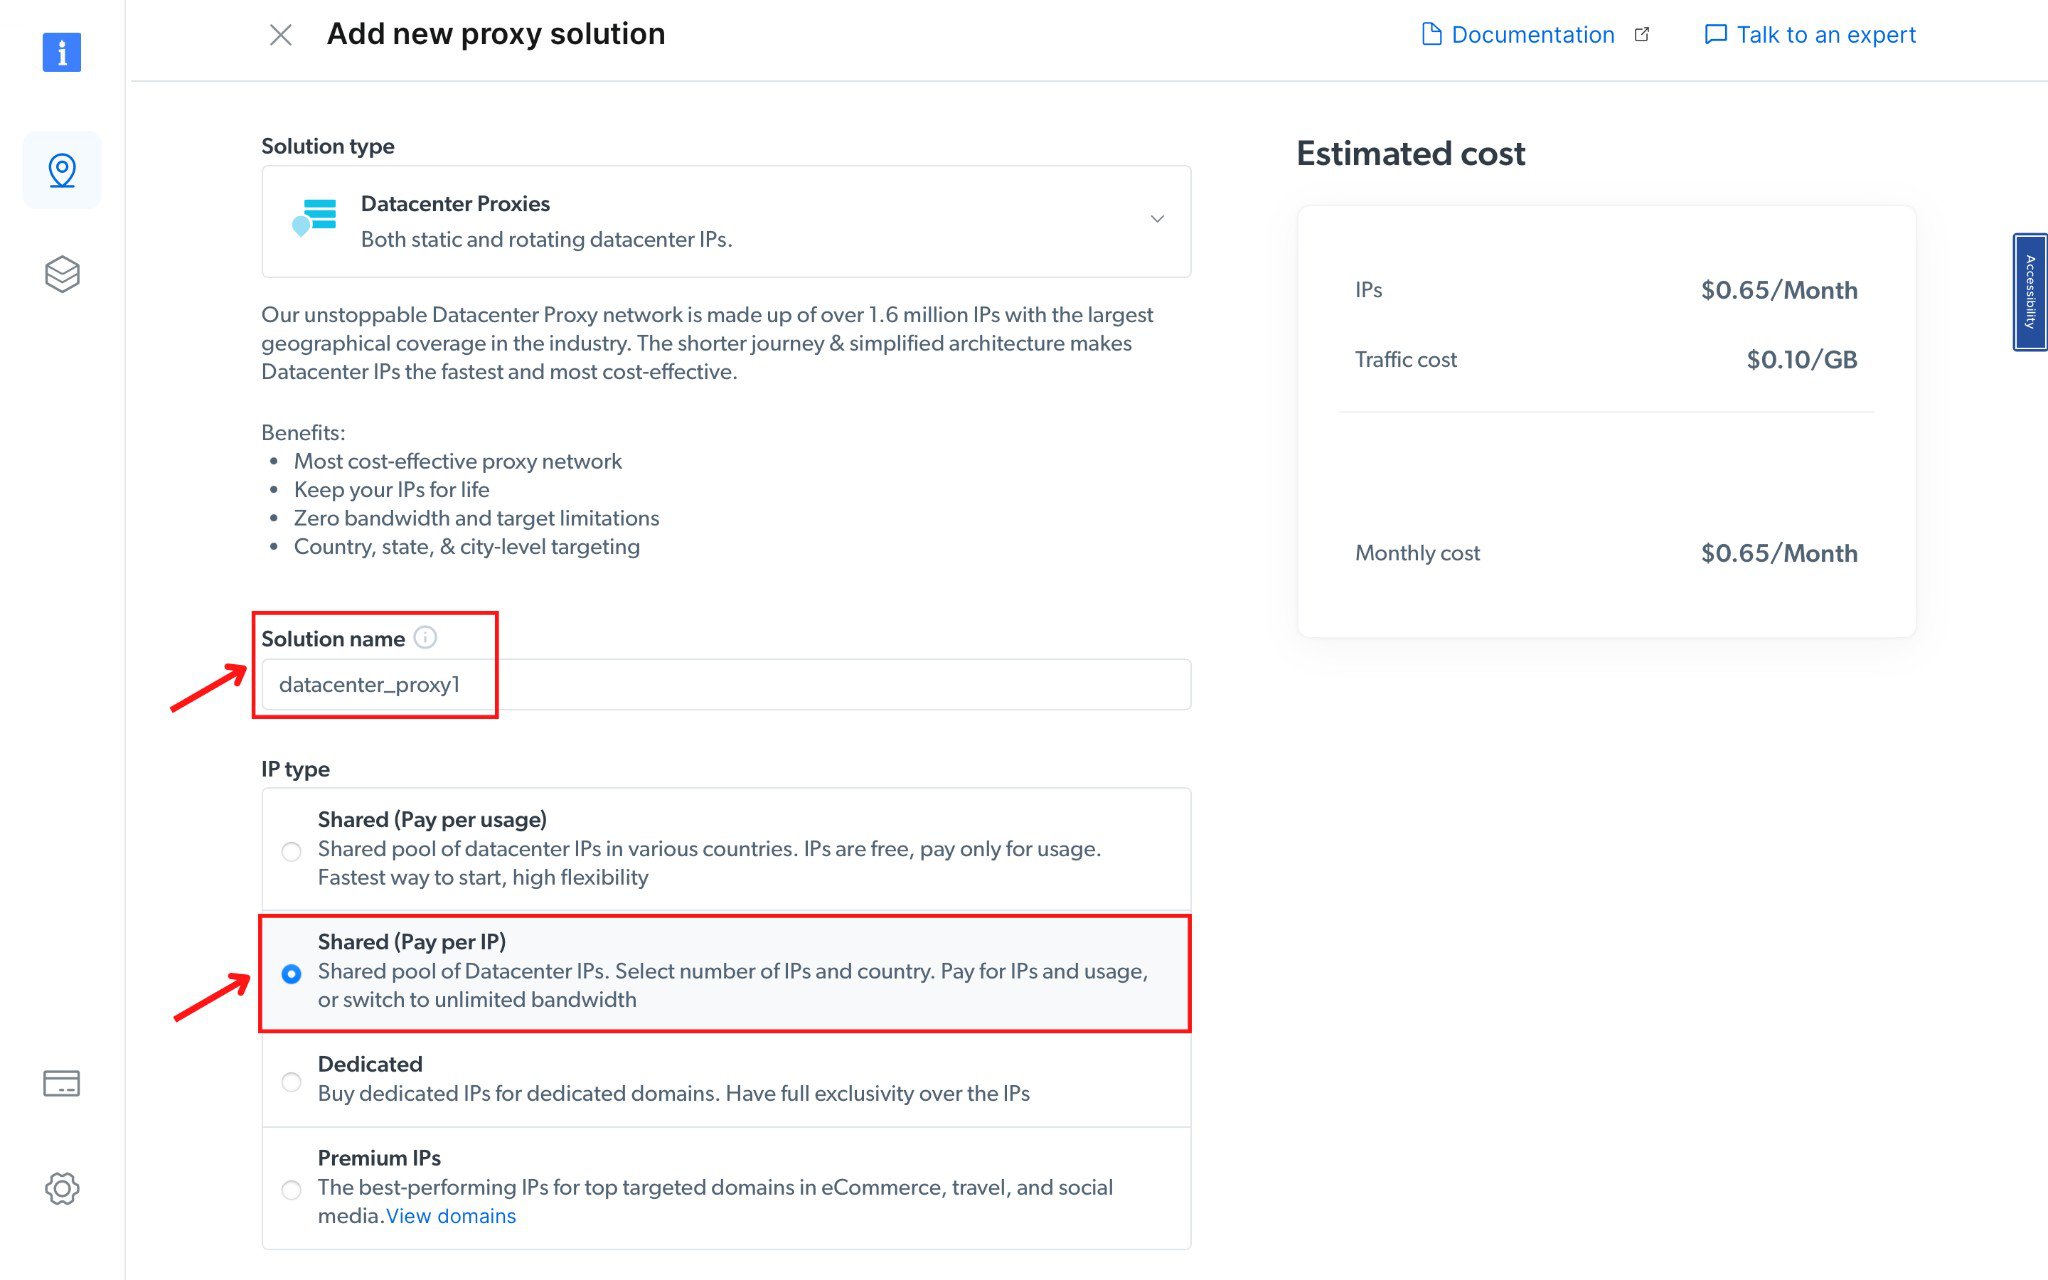
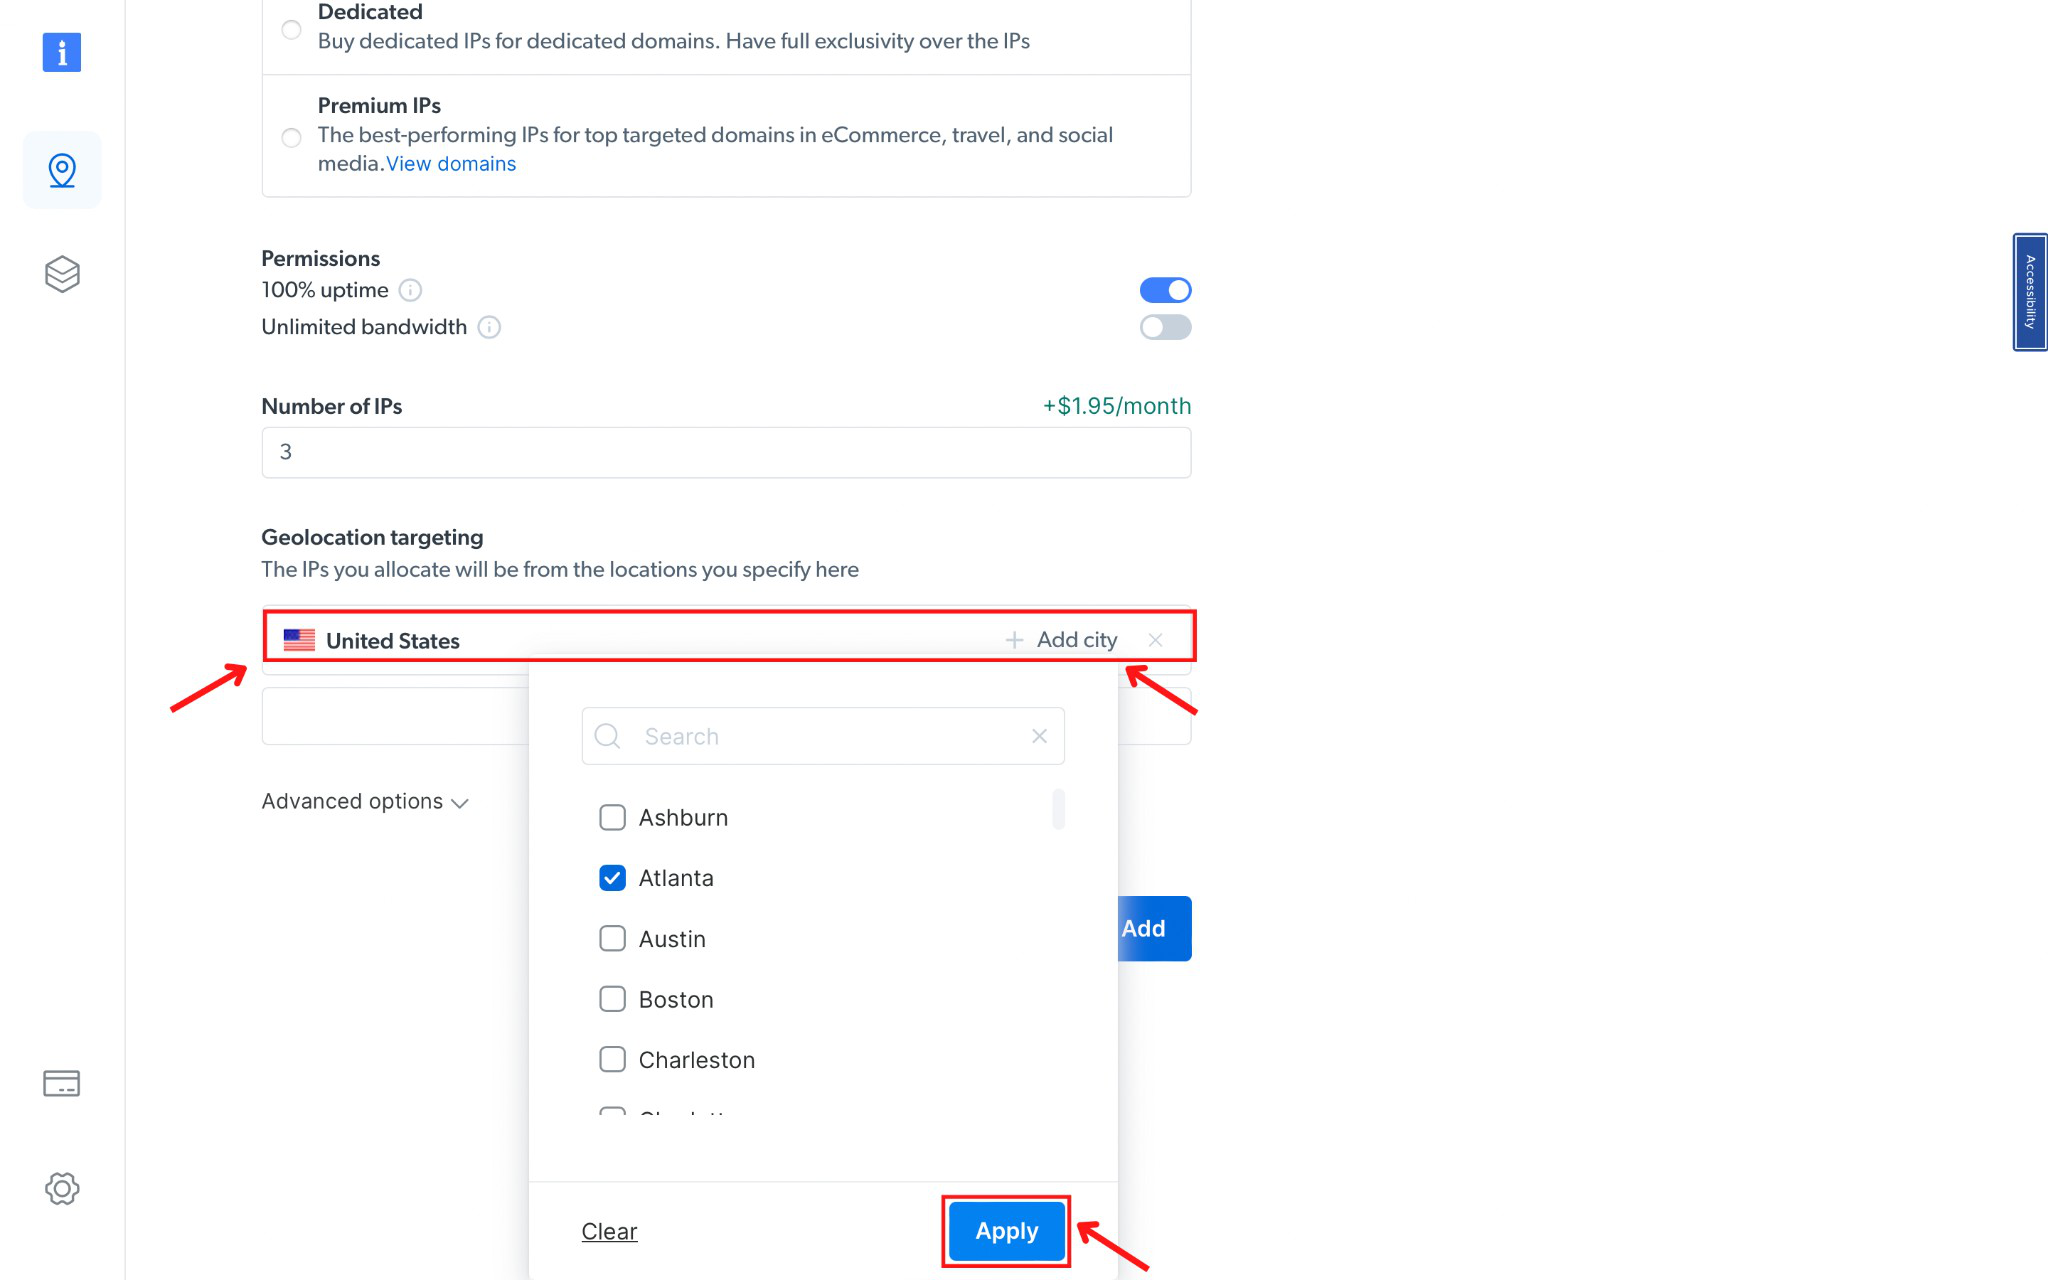
- Choose the Datacenter Network and specify the Zone's name.
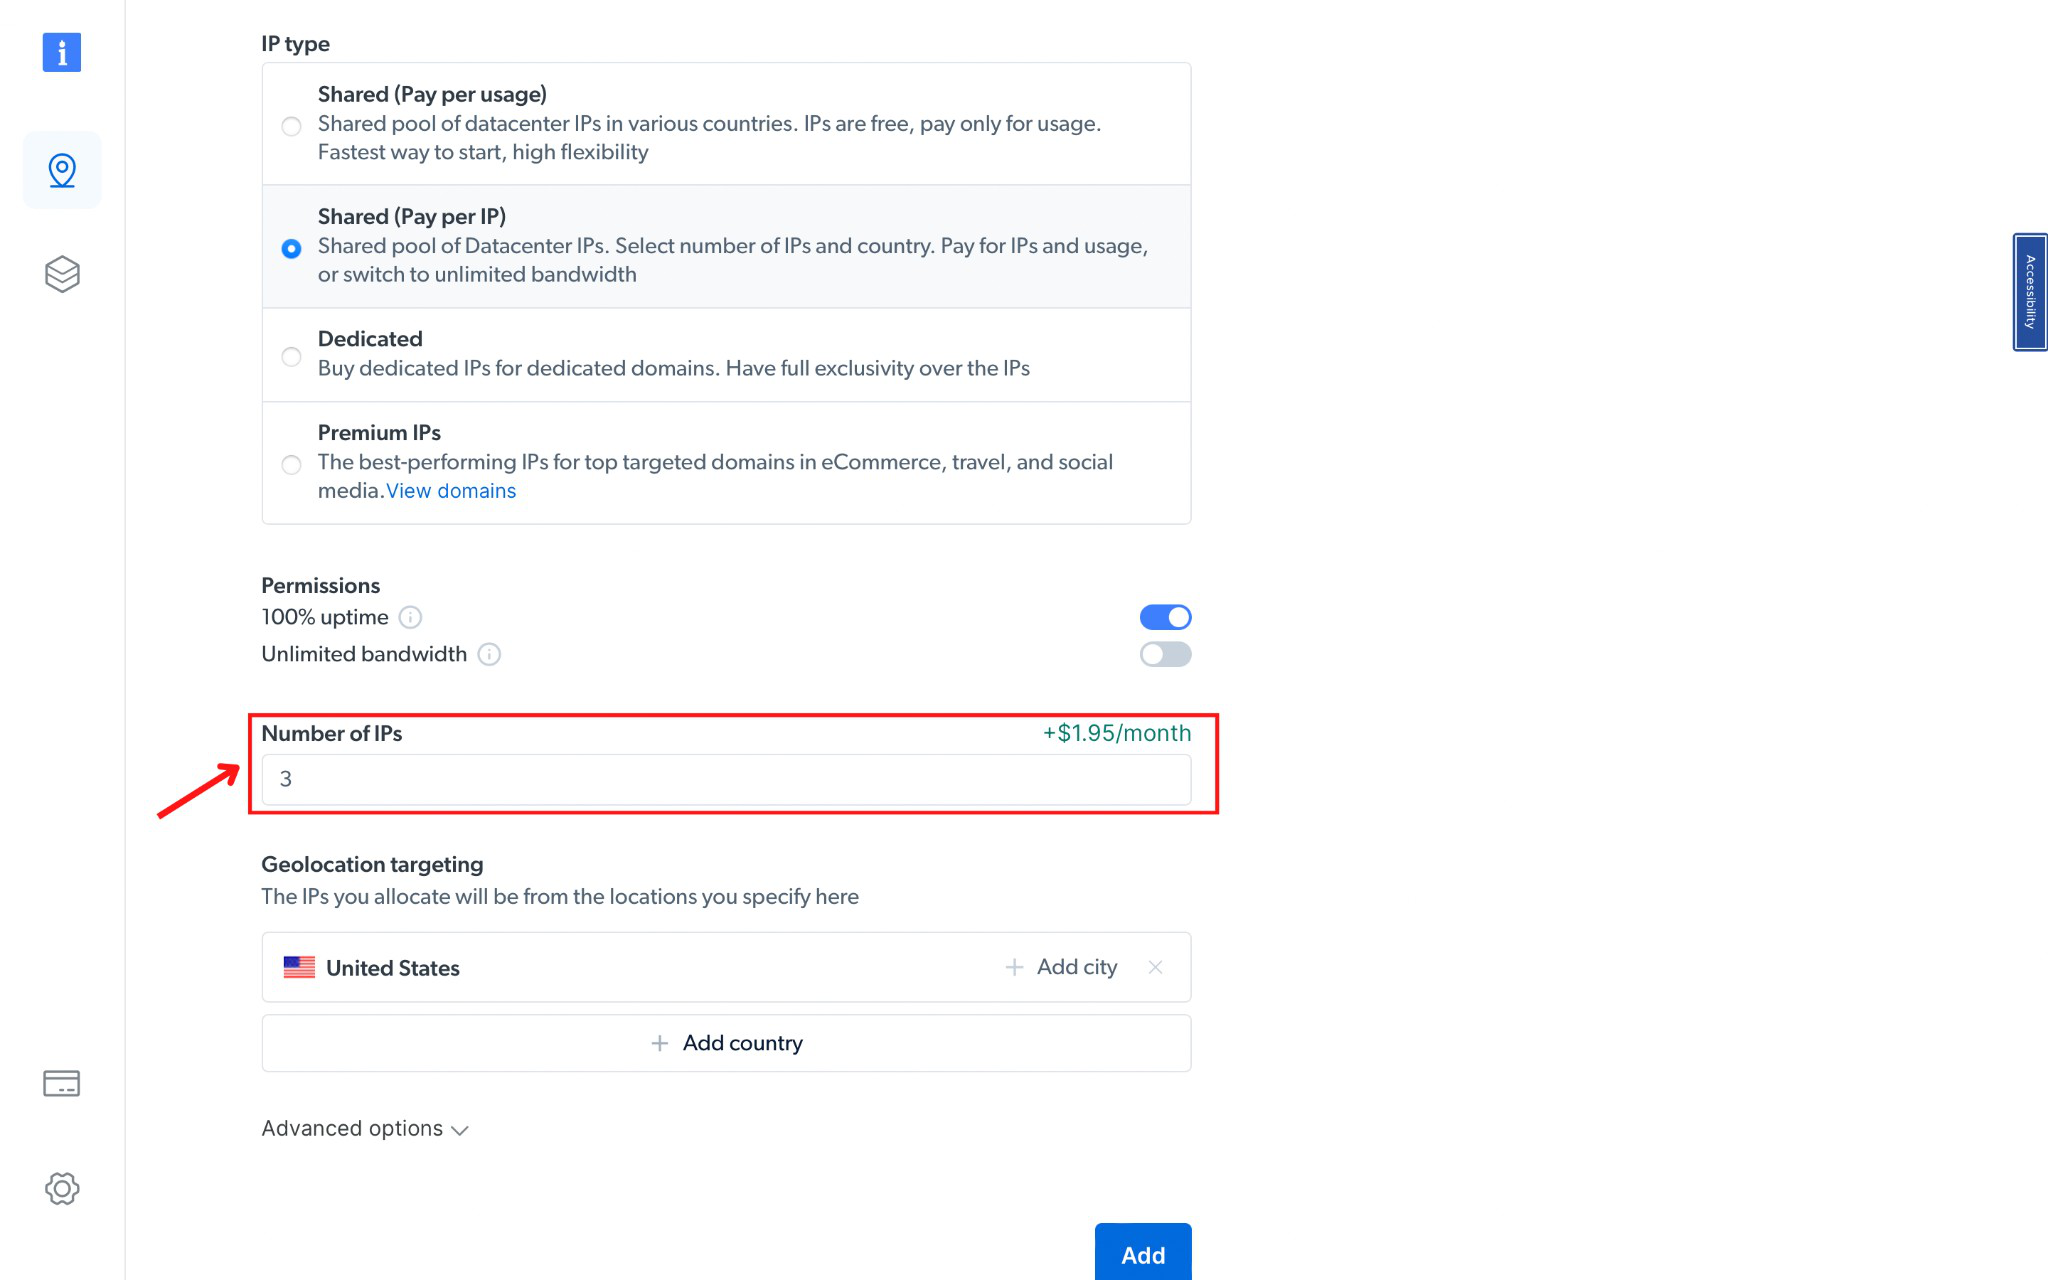
- Select IP type as Shared (Pay per IP) and pick your desired Country & City.
- Determine the number of IPs needed, corresponding to your accounts.
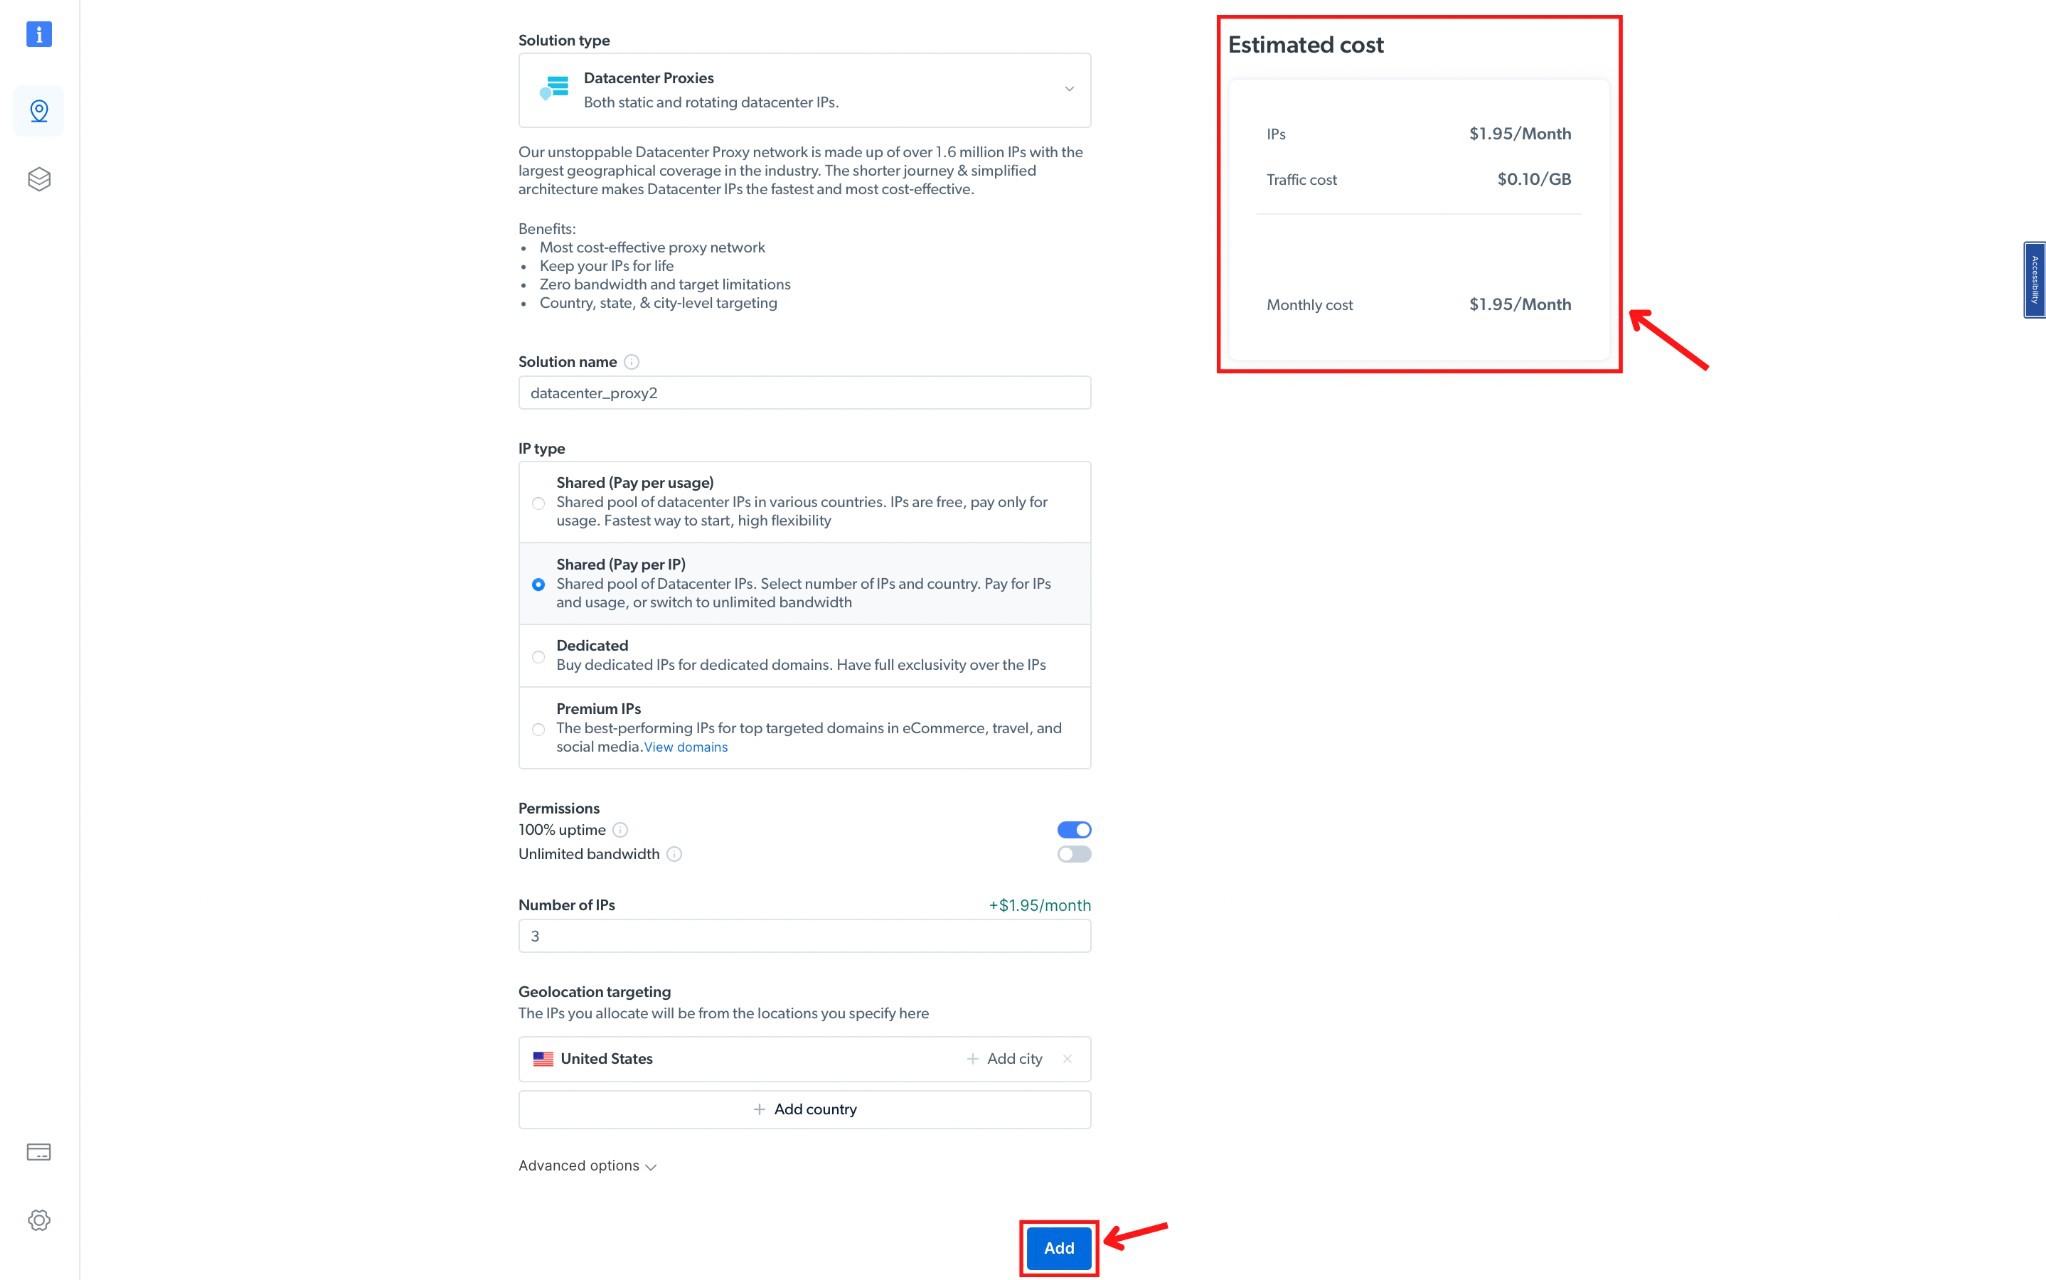
- Confirm your plan and costs, then click "Add."
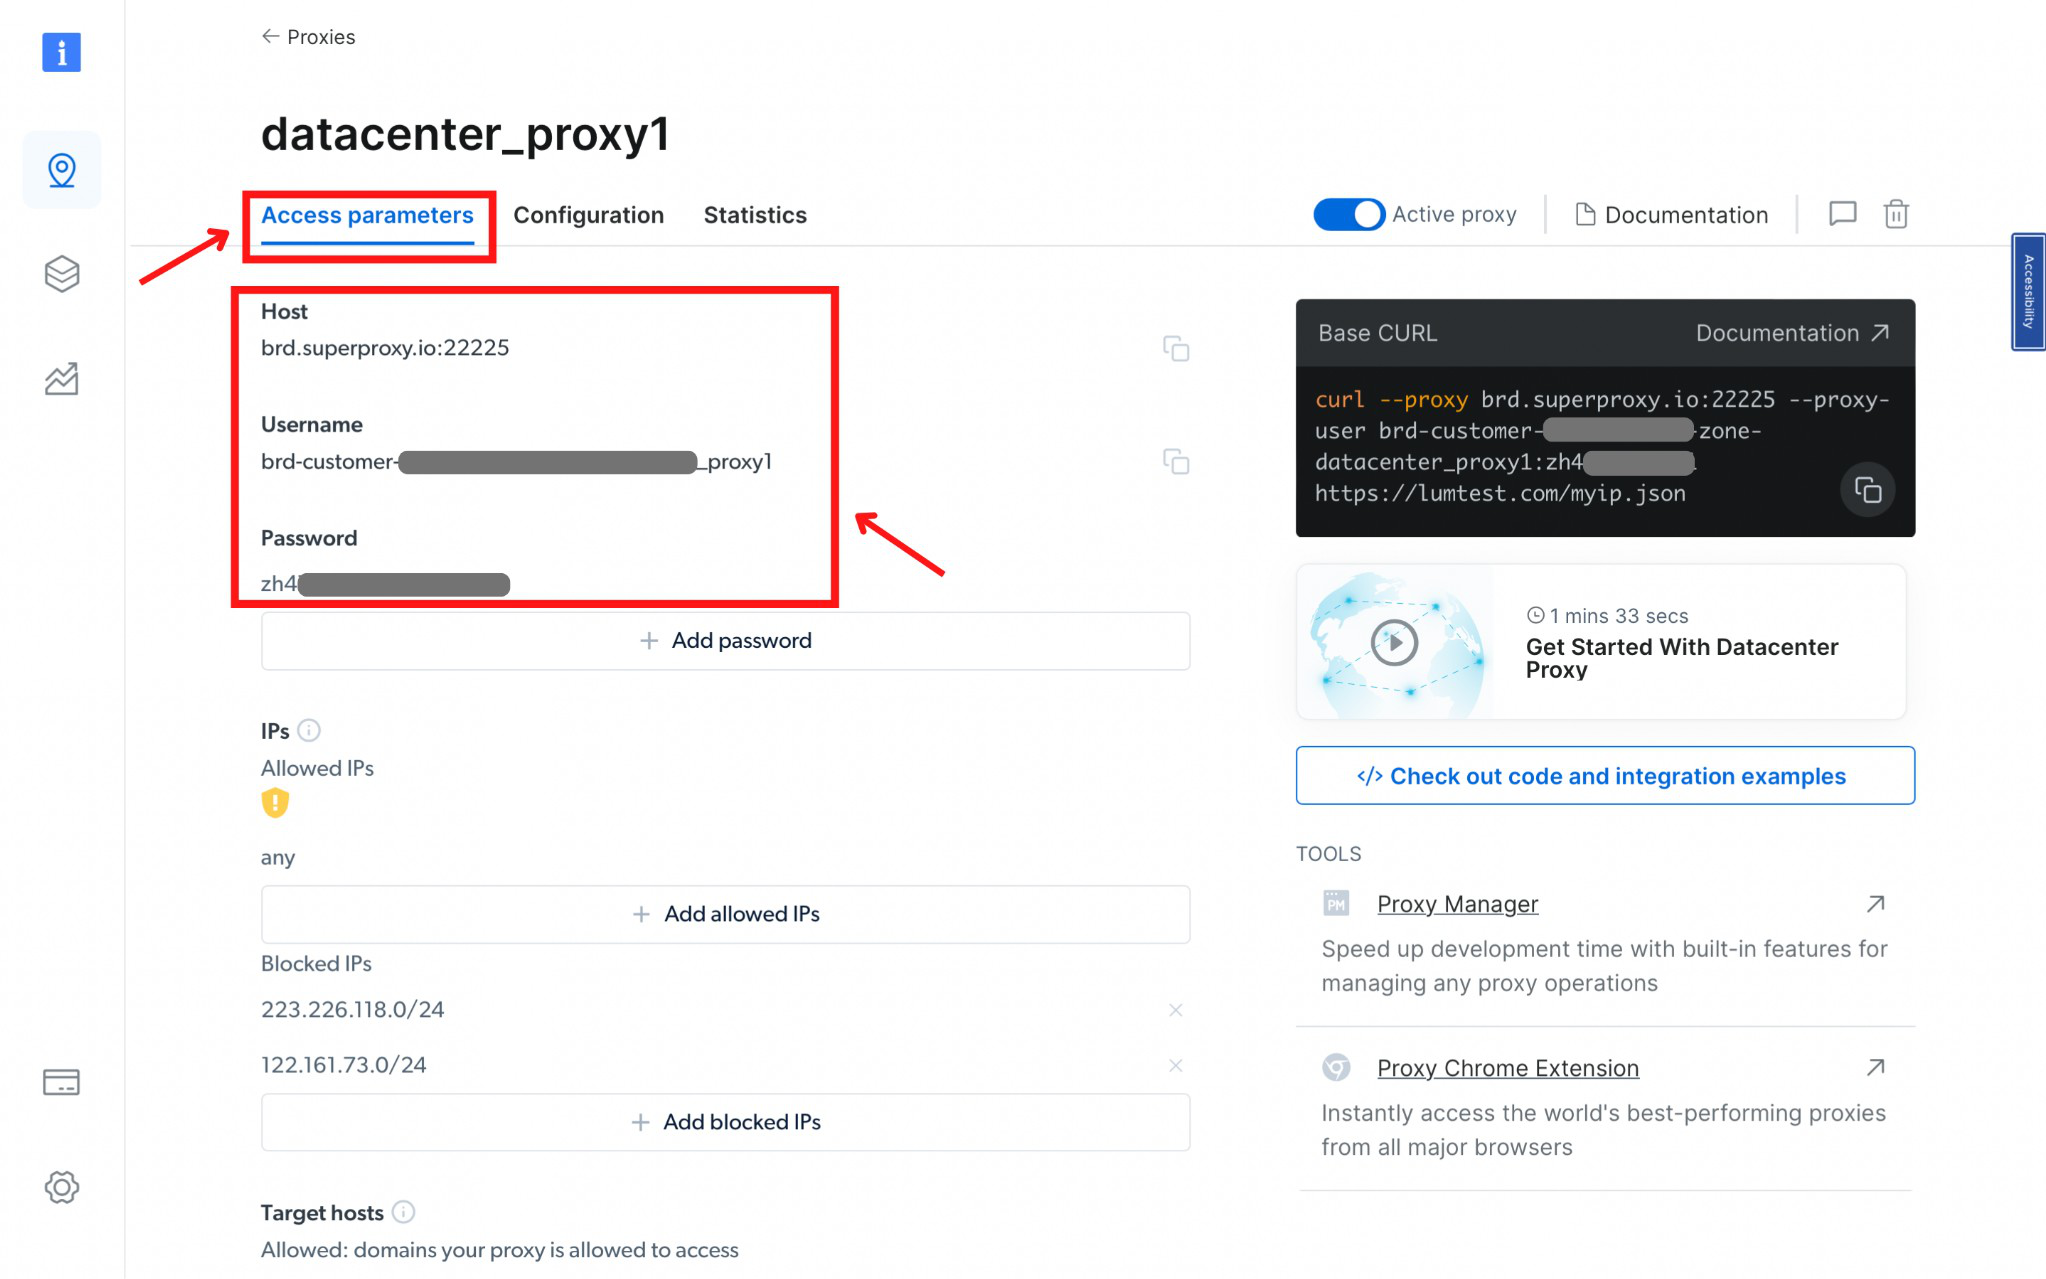
Step 2: Access Proxy Details
- Click on the Zone name, locate the "Access Parameters" tab. Note down the proxy credentials: host, port, username, and password.
Step 3: ixBrowser Setup
- Download ixBrowser (available for Windows only).
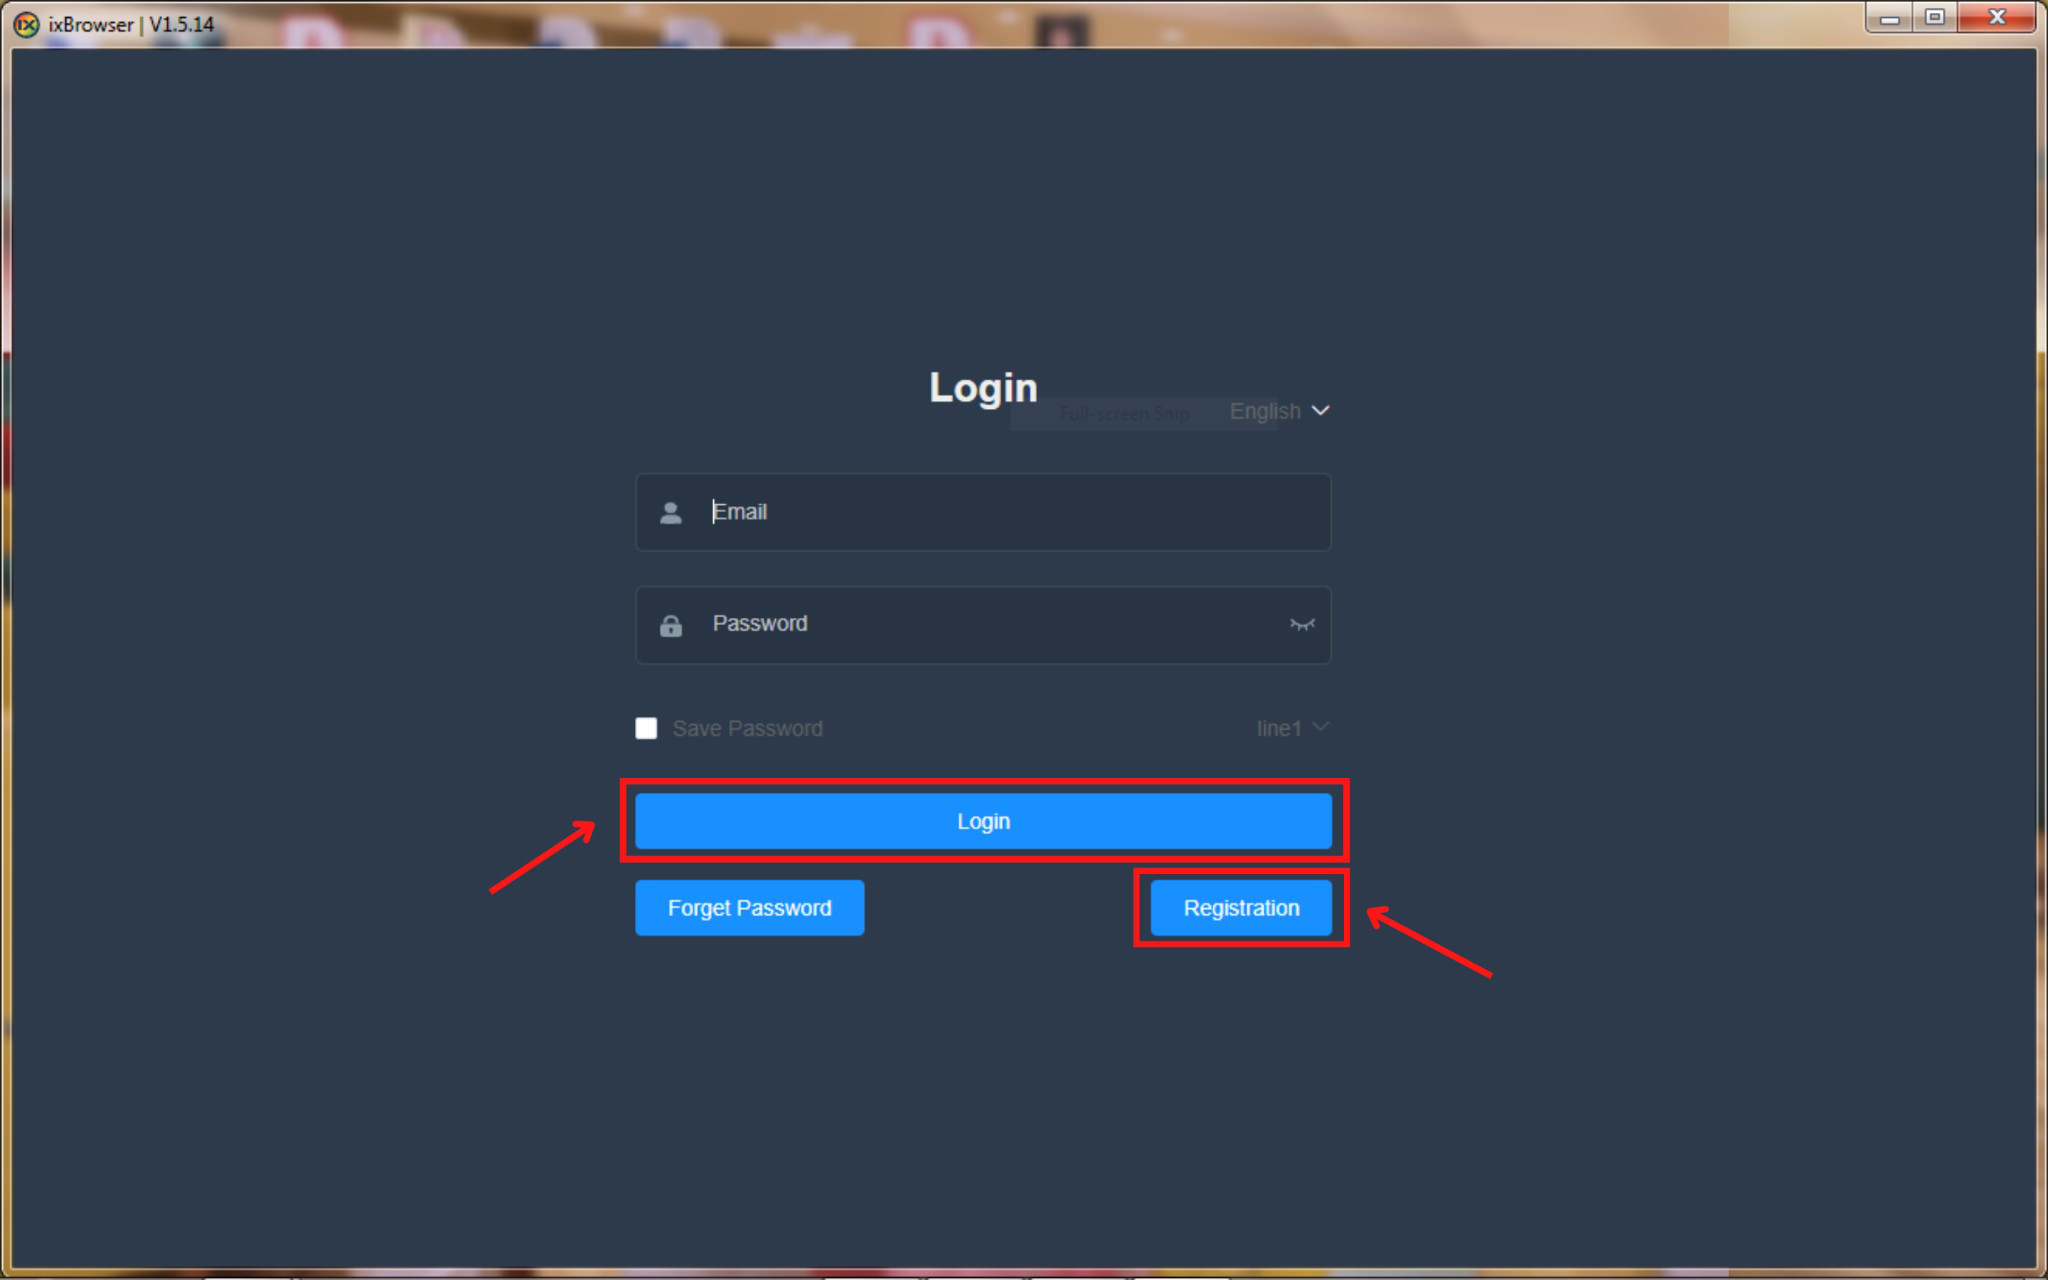
- Register and log in to your ixBrowser account.
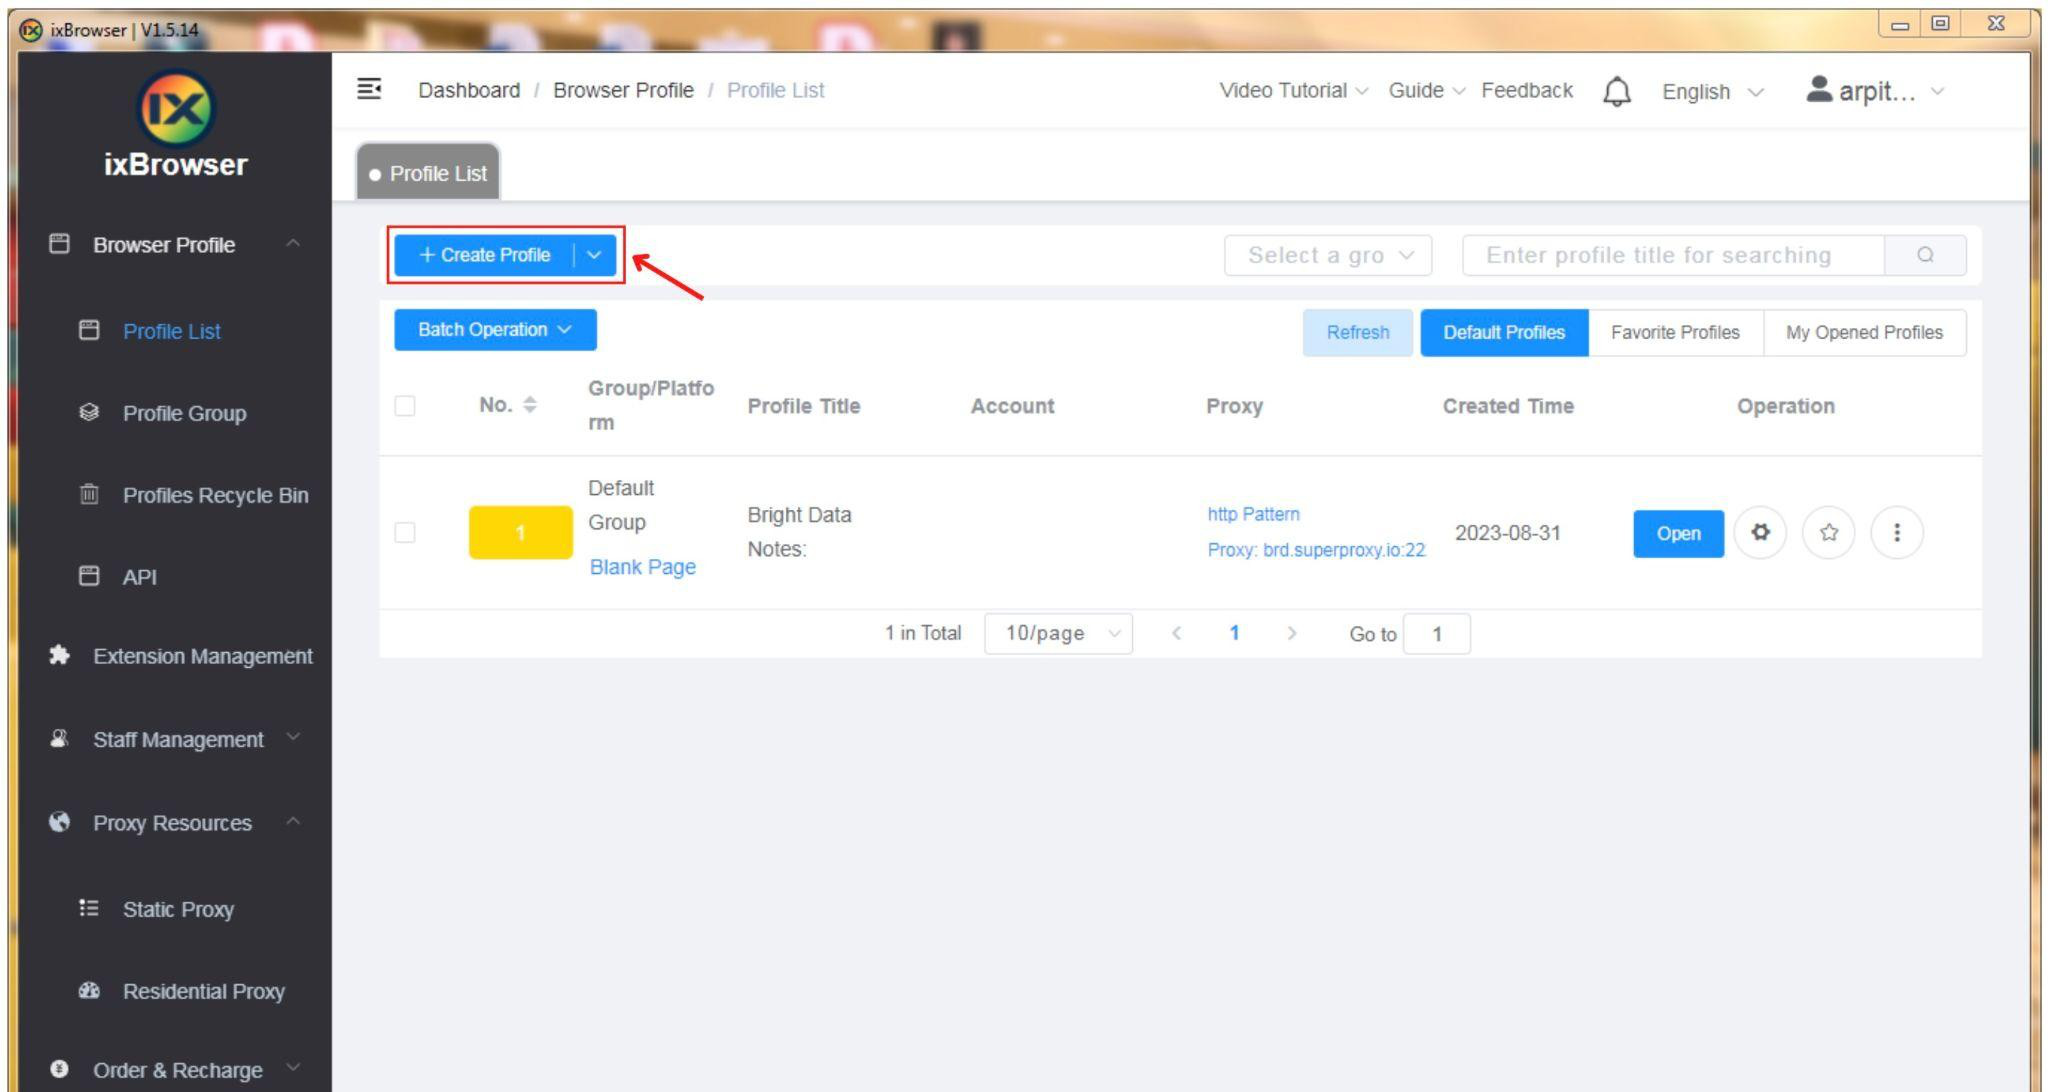
- Click the "+ Create Profile" button.
- Select the platform, group, and profile title and click the “Next Step” button.
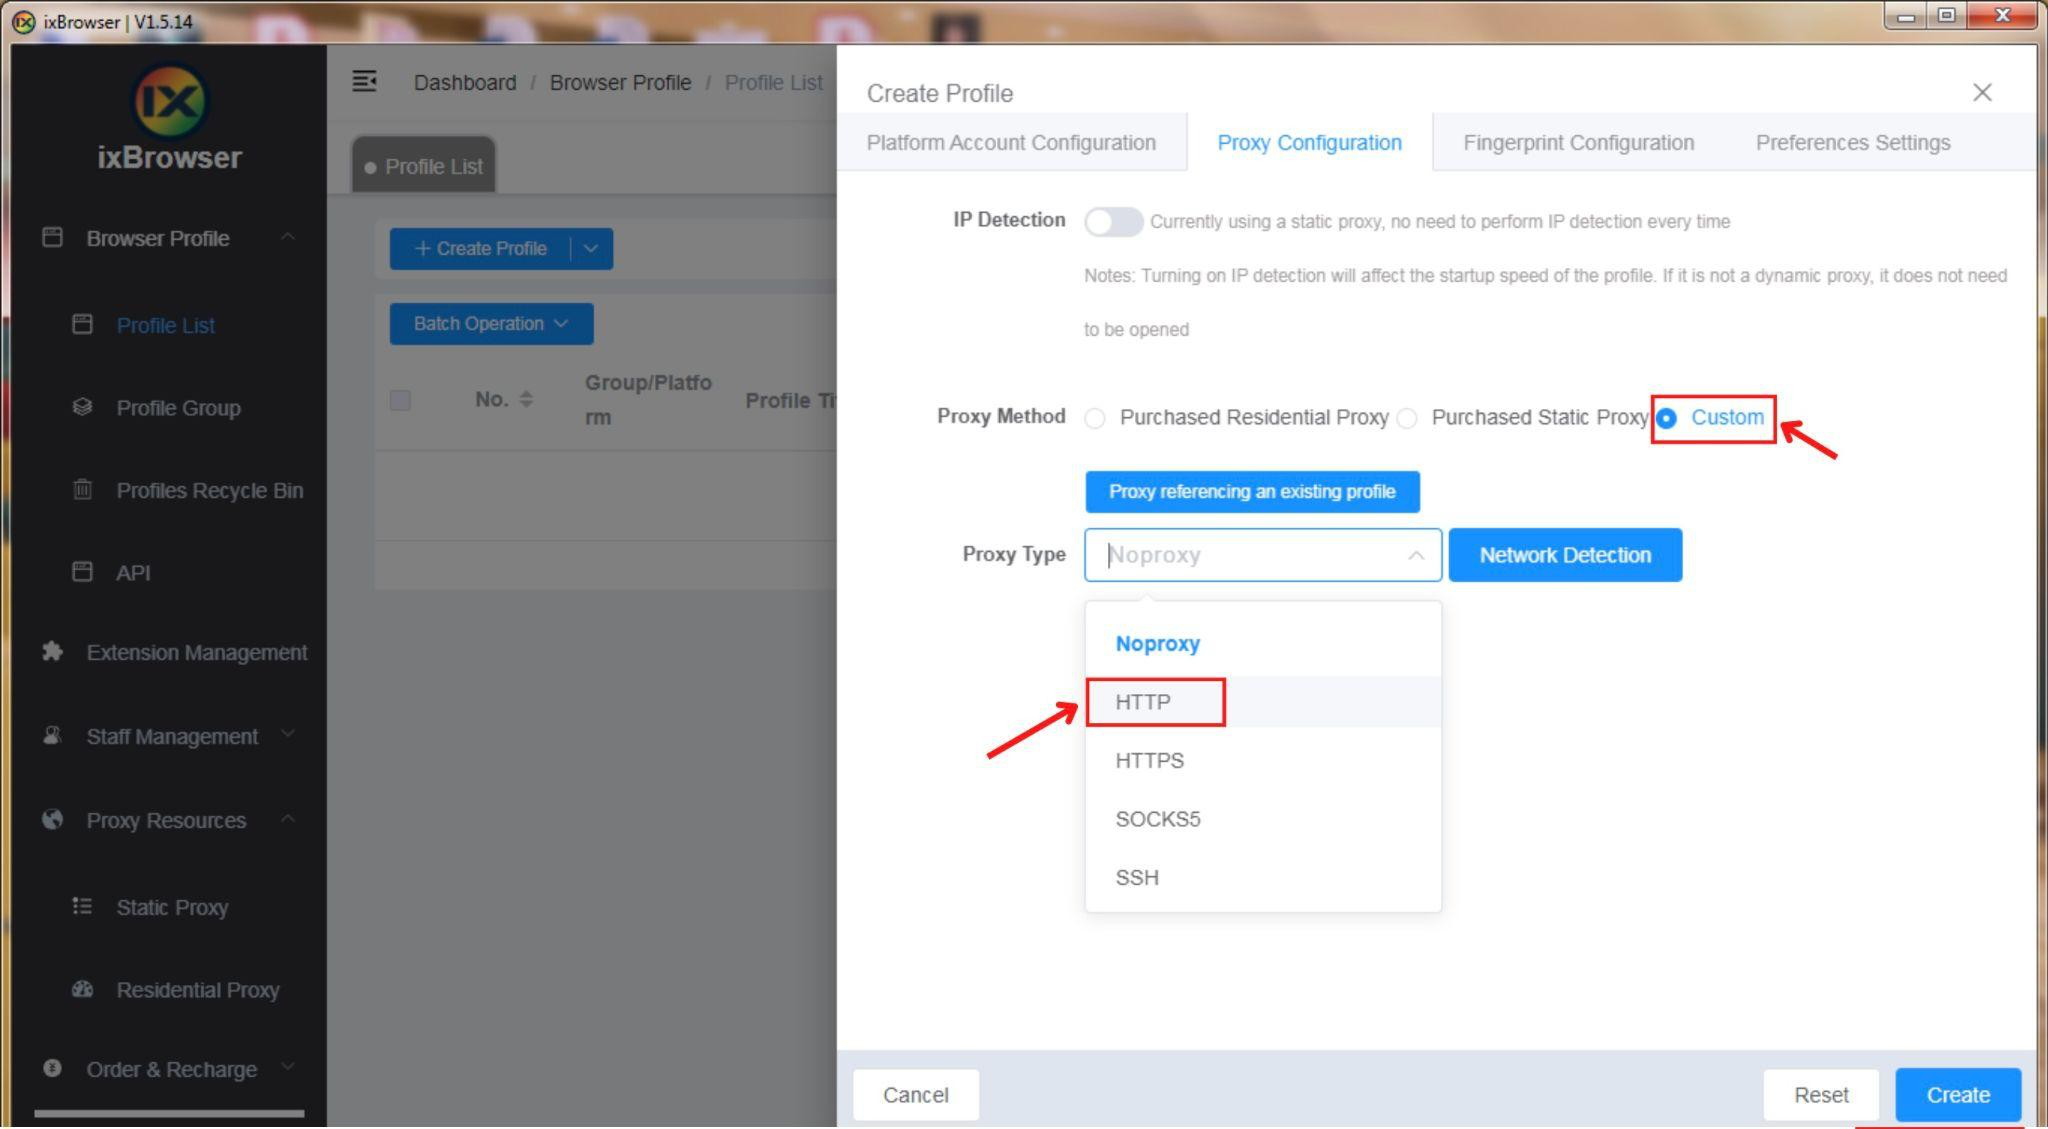
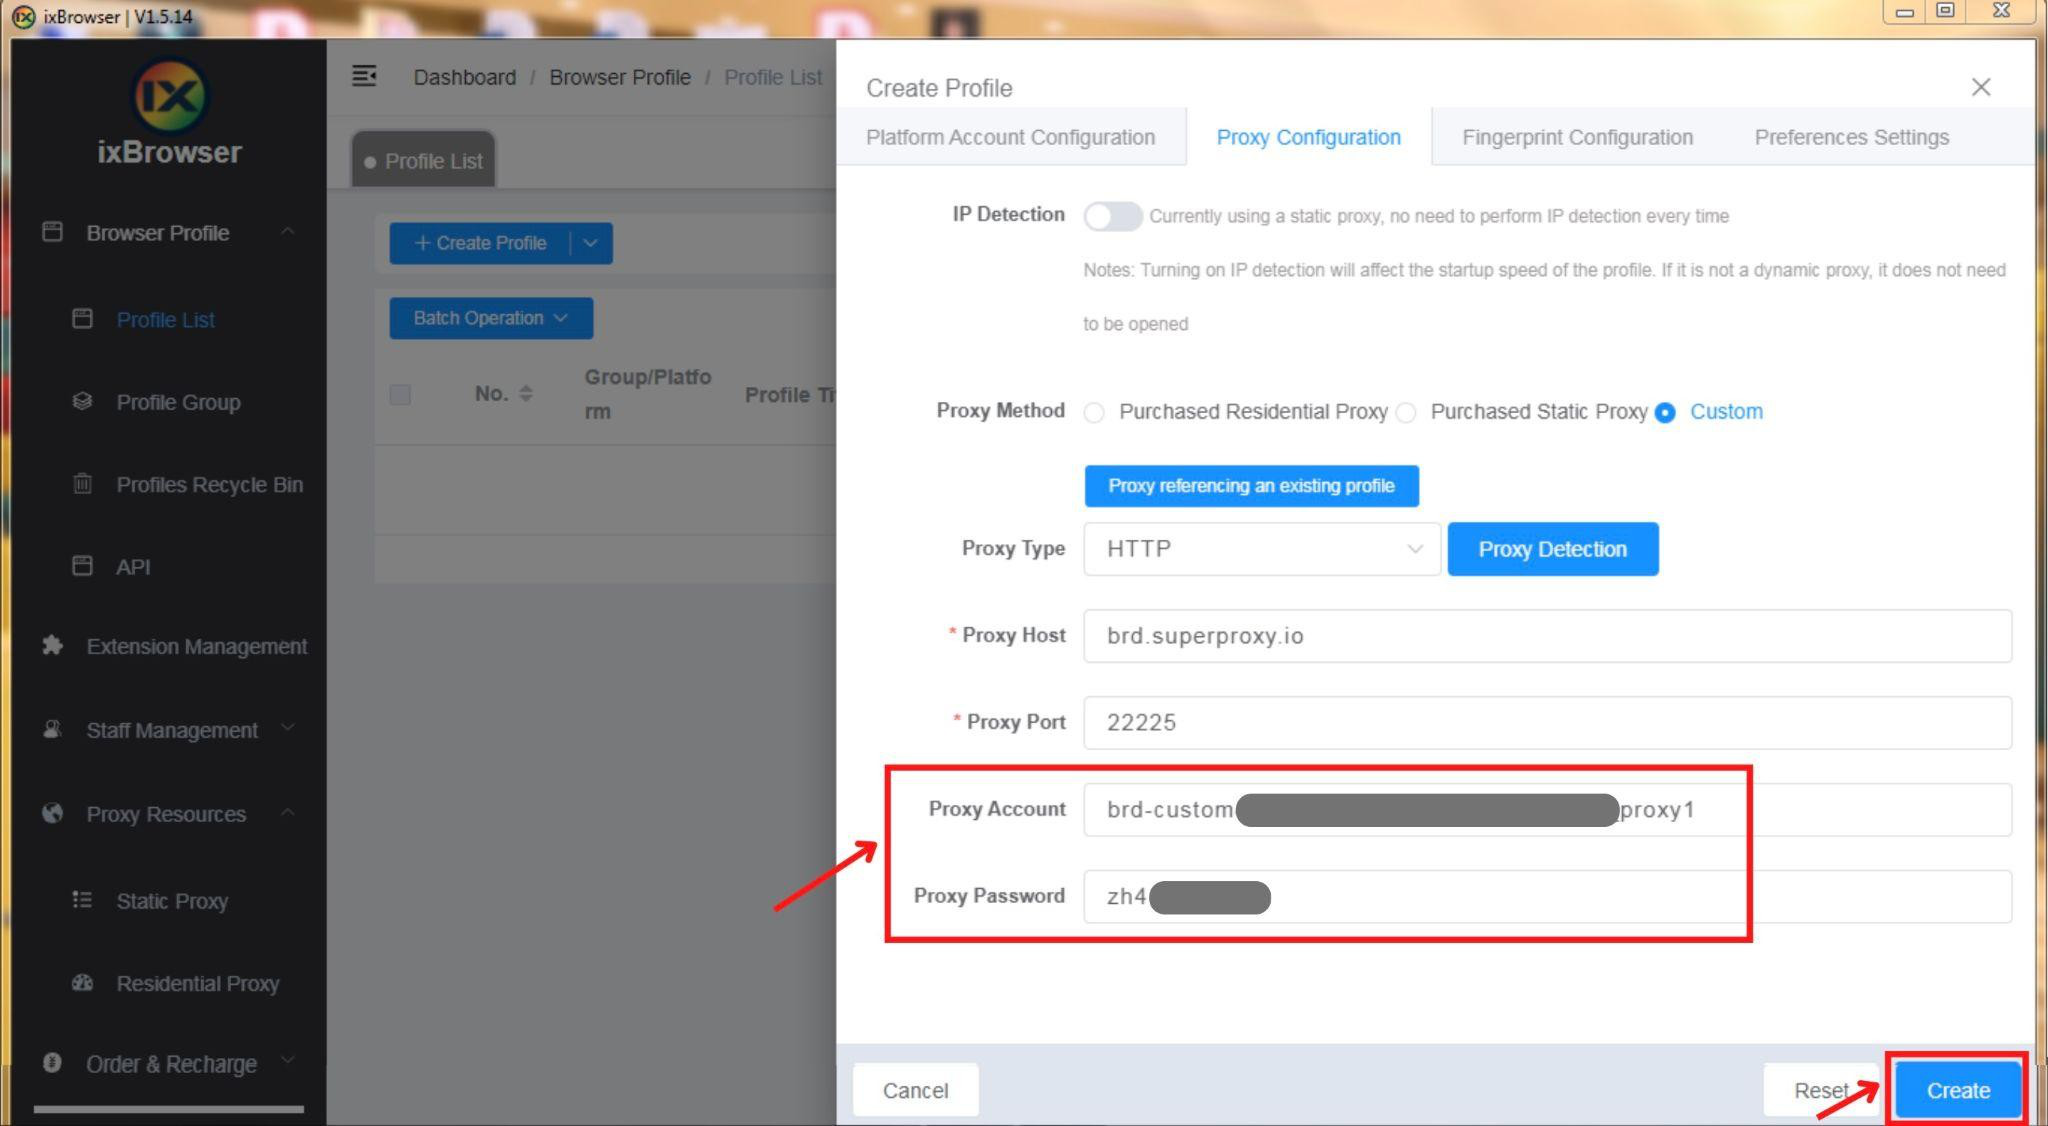
Step 4: Proxy Configuration and Integration
- In the proxy configuration tab, set the proxy method to "custom" and choose the proxy type as "HTTP."
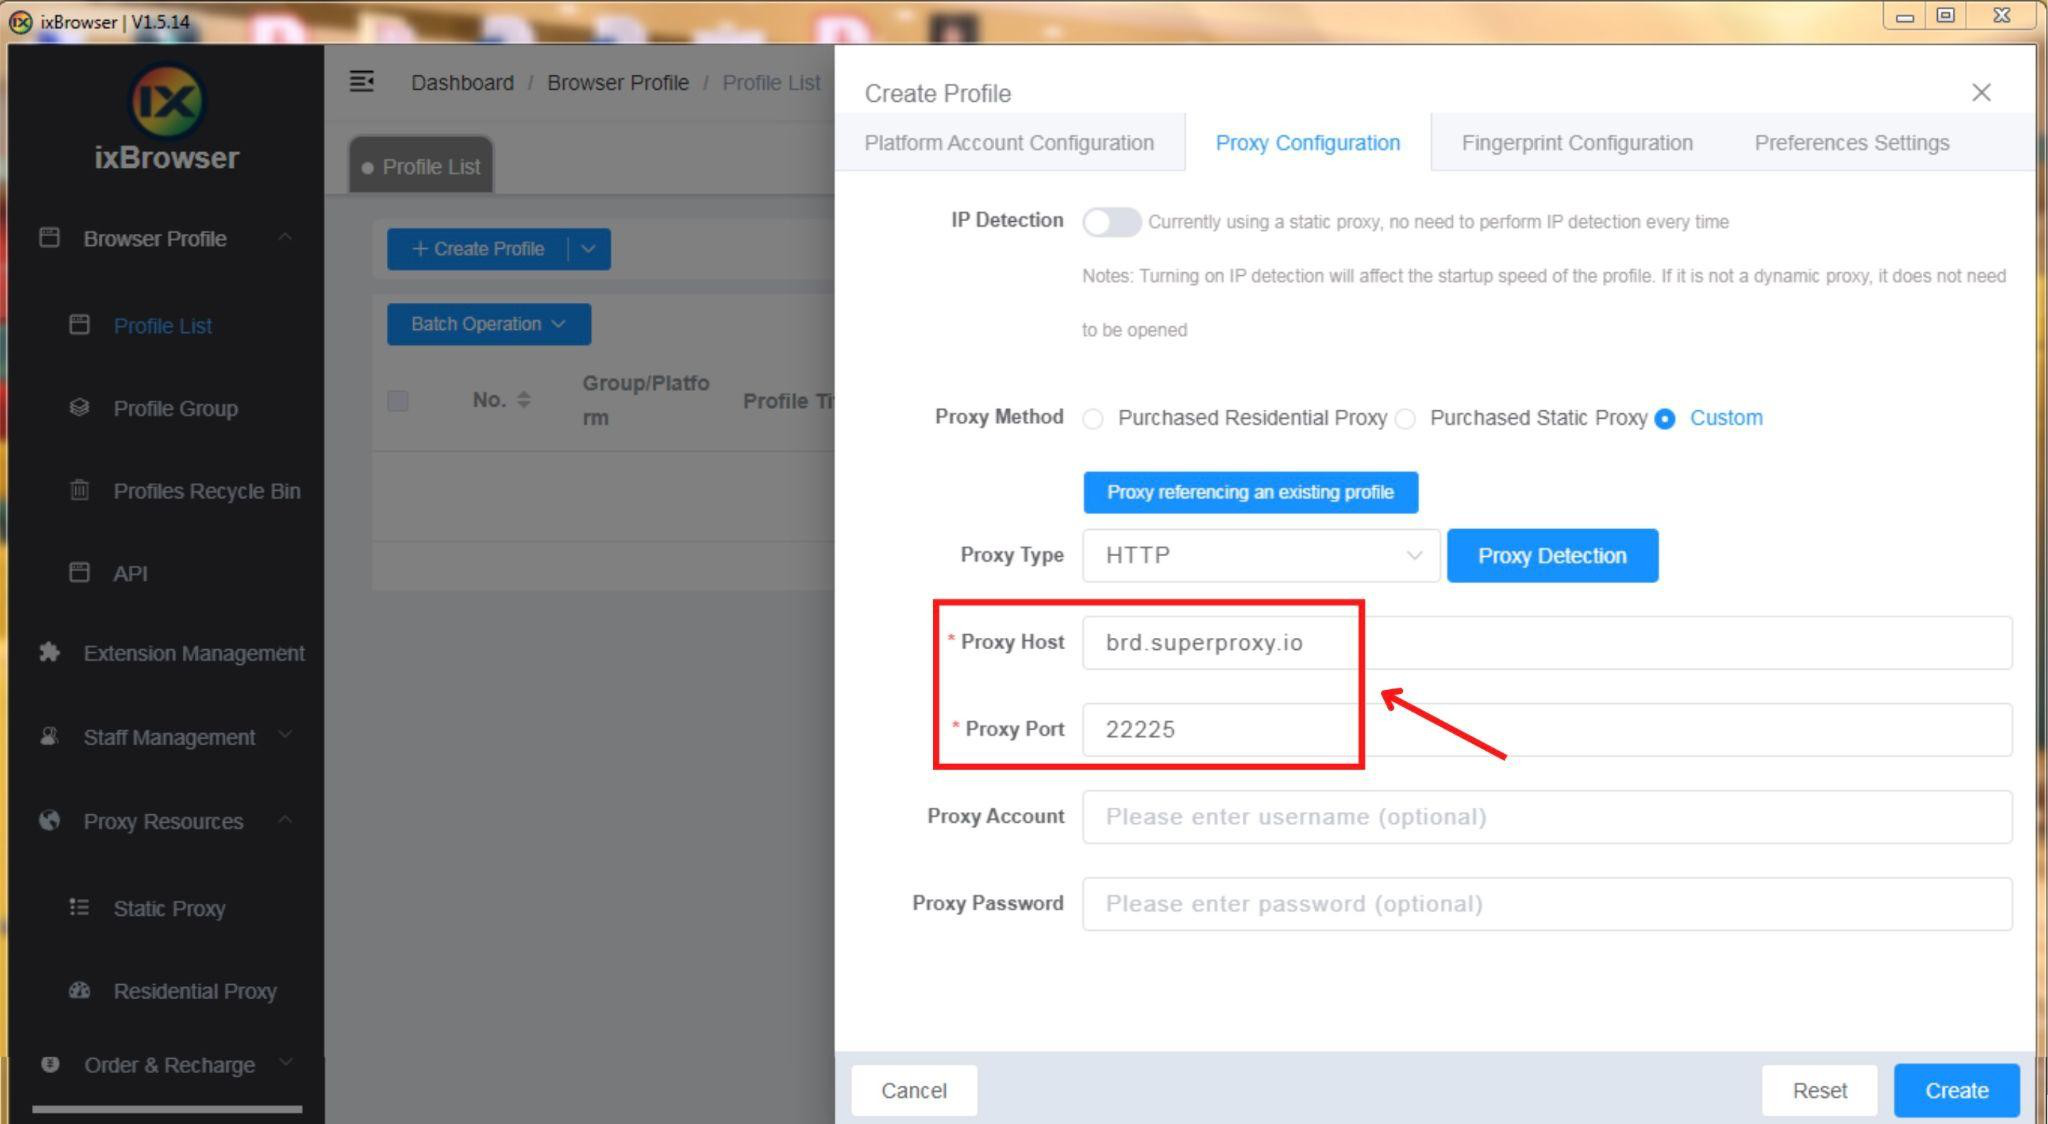
- Retrieve proxy details from the Bright Data access parameters.
- Set the server to "brd.superproxy.io" and the port to "22225."
- Enter your Bright Data username and password, then click "Create."
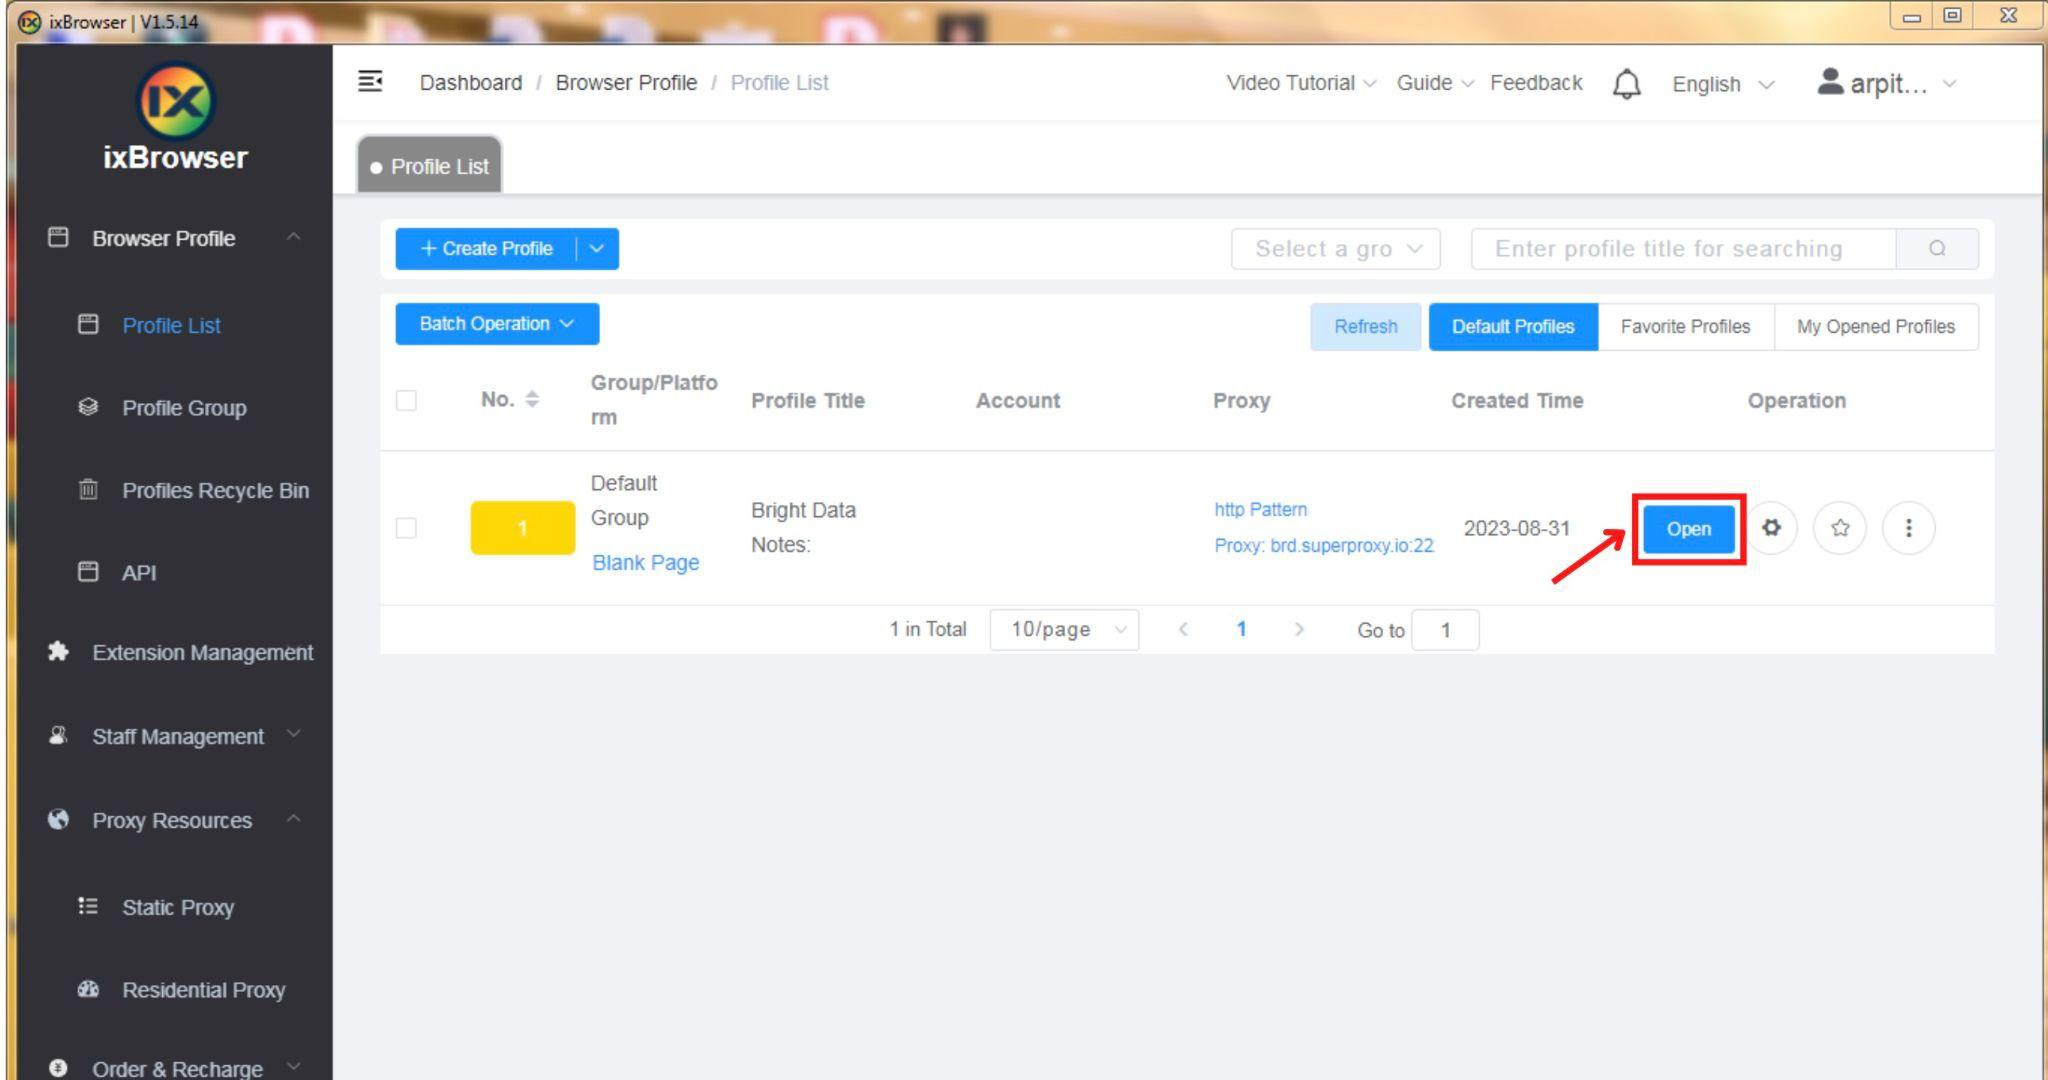
Step 5: Use the Integrated Proxy
- Click "Open" to use the configured proxy.
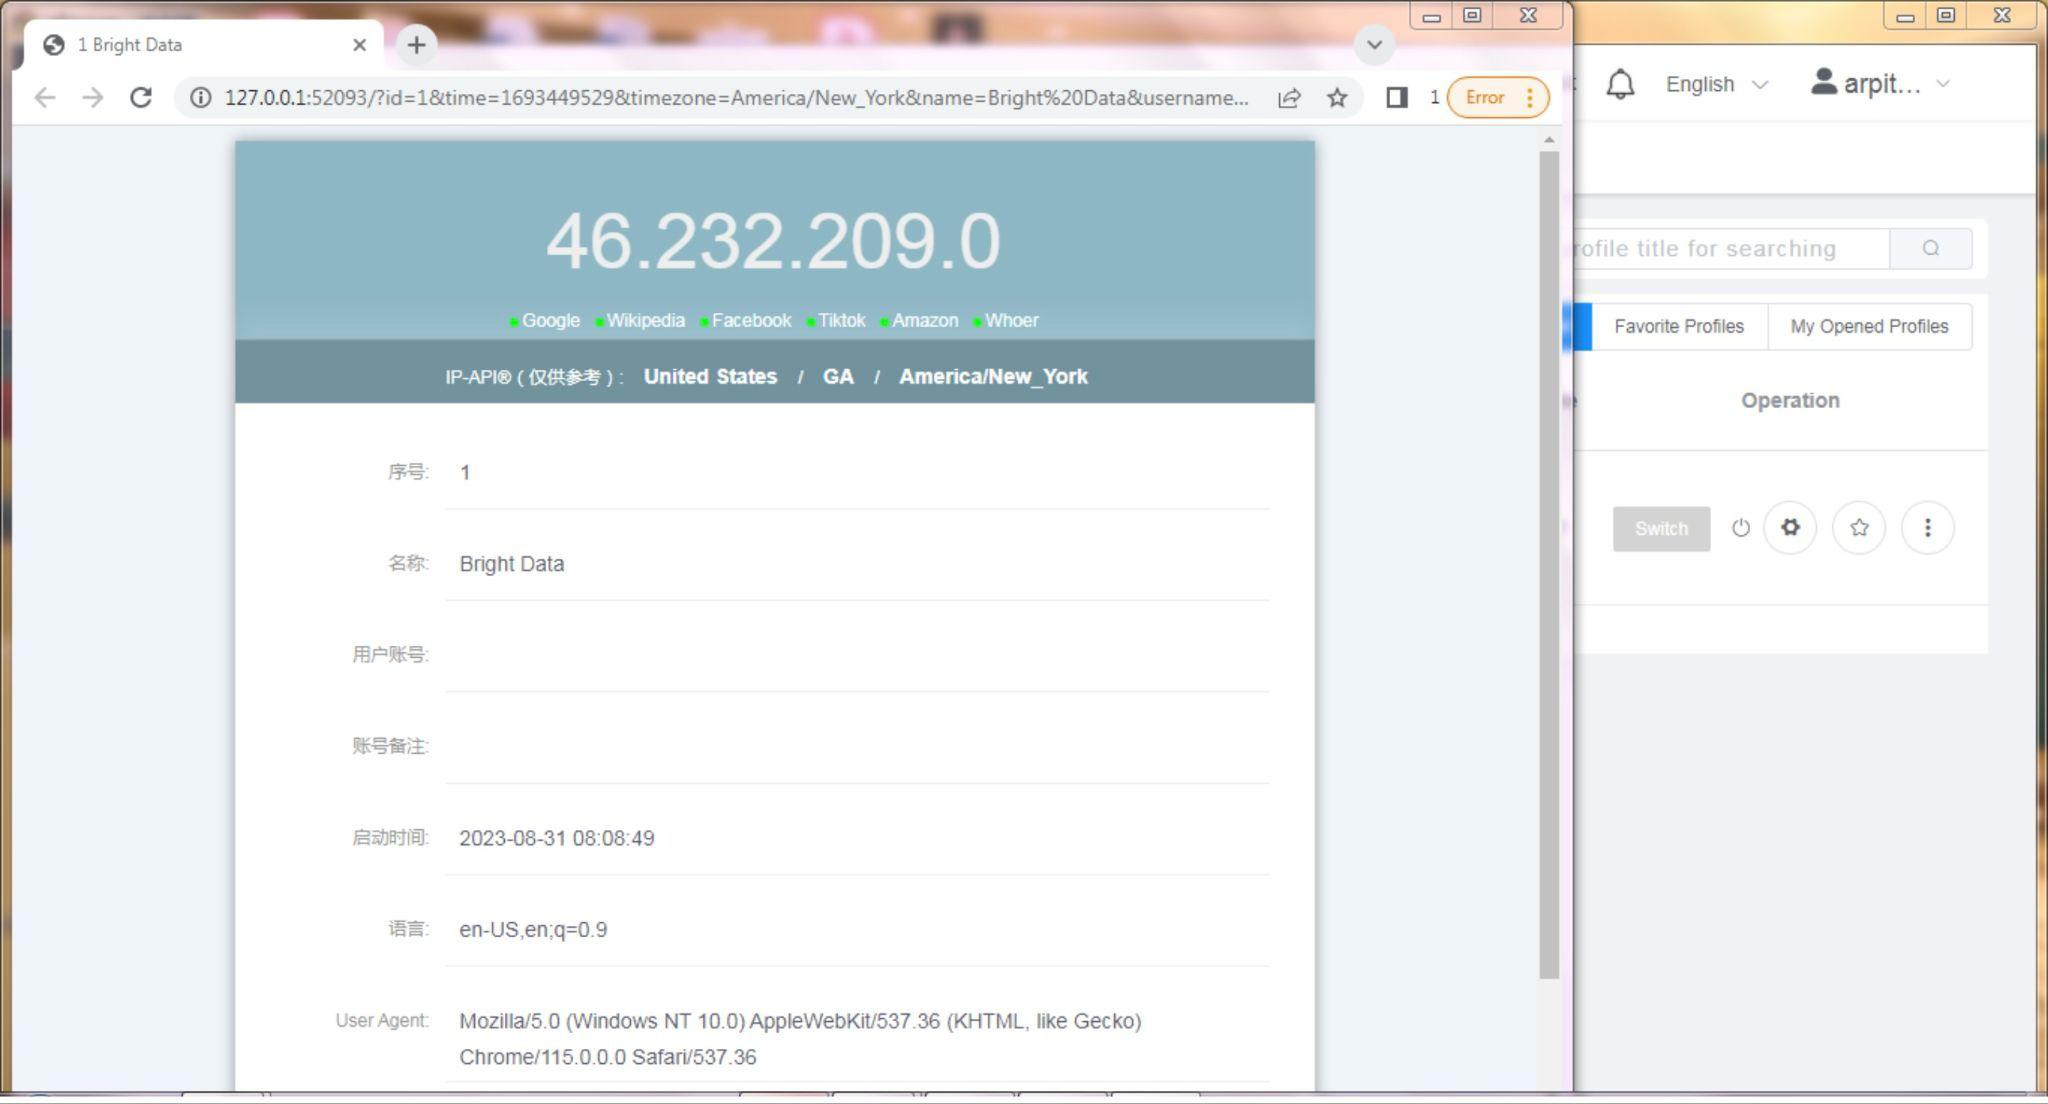
- ixBrowser will open with your preferred settings and the integrated proxy.
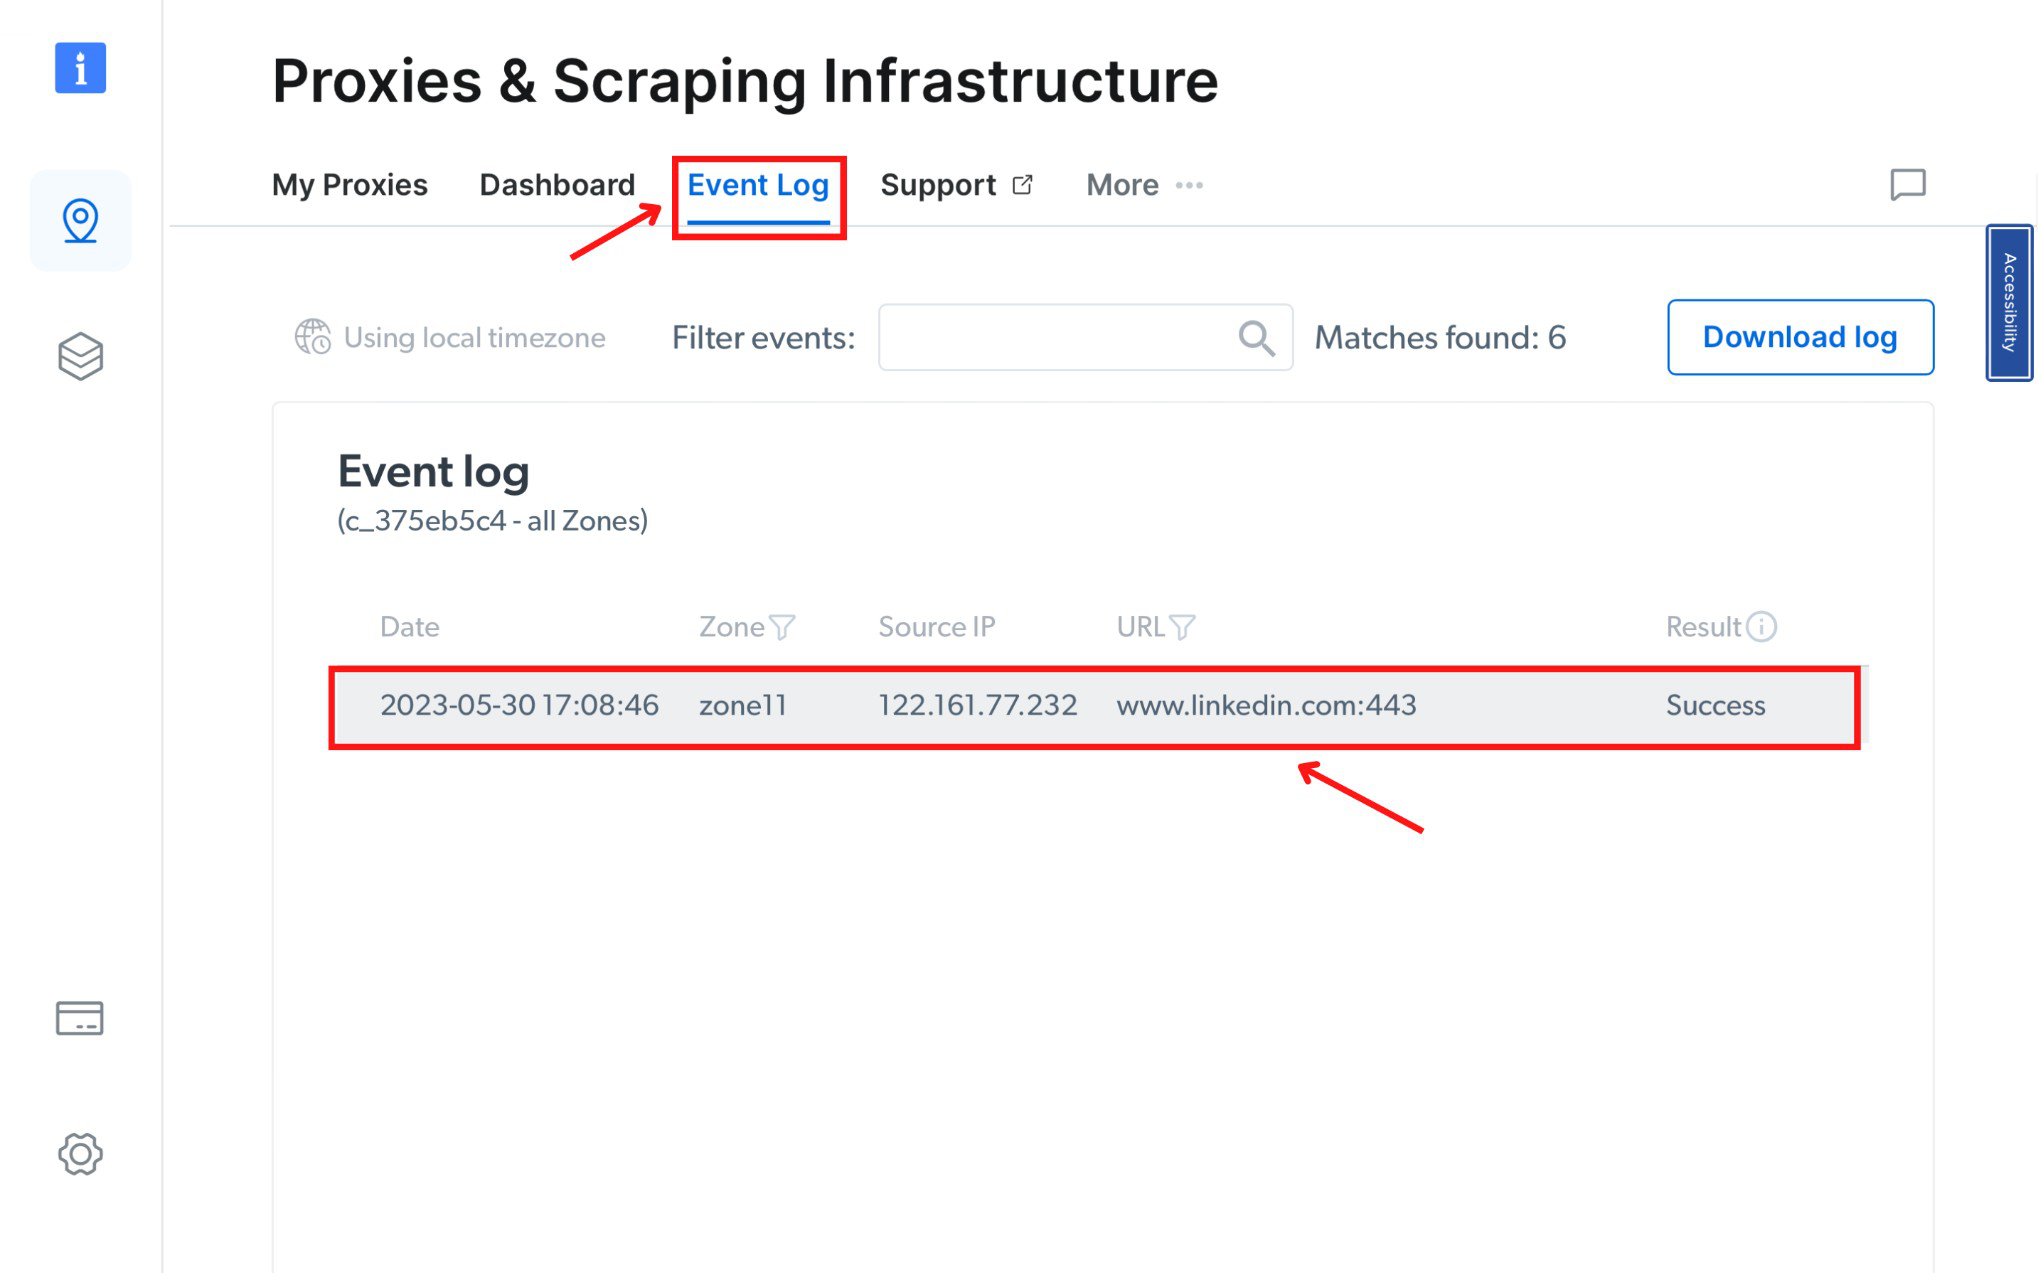
Step 6: Proxy Confirmation
Confirm the Bright Data proxy usage by checking the Event Logsection in your Proxies & Scraping Infrastructure dashboard.
In Conclusion: By following these numbered sub-steps, you can seamlessly integrate ixBrowser with Bright Data's robust proxy system. This integration equips you with advanced fingerprint technology and reliable proxies, enabling secure online activities and data scraping.